If you bring up marketing automation or email marketing with someone, it seems to be just a matter of time until split testing comes up.
And if you use Keap (formerly known as Infusionsoft), you may or may not have noticed that there isn’t an easy split testing feature built into the campaign builder.
Well, fortunately some smart people have already solved this with third-party solutions like MyFusionHelper and PlusThis.
Those tools are great, and there are dozens of use cases for either one, but just last week I realized that you could use use Zapier to implement split testing in Keap as well.
I’m sure I’m not the first person to figure this out, in fact there may even be an easier way, but this was the first time I’d stumbled onto this and so I wanted to share in case it helped you out too.
Anyway, without further ado; here are the steps for using Zapier to split test in Keap:
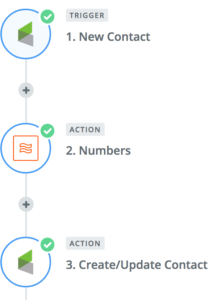
Create a custom field (whole number type) in Infusionsoft, and name it Split Test.
Choose the trigger for your zap: This will be what initiates the zap, you could choose to have it run when any new contact is created, or when a specific action takes place, like a tag is applied.
Use the built in Zapier formatter function: This step will use the Spreadsheet Style Formula option to randomly generate a number. For that part you’ll use the RANDBETWEEN(min, max) formula. If you want to split into two groups you’d use RANDBETWEEN(1, 2), and if you wanted to split into thirds, or quarters you’d just change the second number.
The third step will be to update the contact record in Infusionsoft by mapping this new value to the Split Test field you created in test one.
Then, use this value to branch contacts between your various sequences, or in searches to determine your broadcast groups. (Yes, this will require a little manual effort.)
For those of you who are more visual learners, enjoy this short video walking you through the process:
Yes, this isn’t a perfect solution, and it may not be as elegant as some of the other options out there – but if you already have a Zapier subscription then this is one way to get a little more bang for your buck. We’d love to hear if you end up using this, or if you have clever ideas to simplify this further.
And if you like stuff like this, then download our Monkeypod Toolbox ebook for the full list of tools we trust:
Keap’s landing pages have actually come a long ways, and if you haven’t used them recently, they’re worth another look.
They’re mobile responsive now, and just generally easier to use.
However, they’re still not as full-featured as we need sometimes. So, plenty of people, myself included, decide to use a third party tool to build their landing pages.
There are a number tools out there for this purpose, and you should do some research and choose the one you’re most comfortable with, but for me, I use LeadPages.
Sometimes I get questions from people as to why I use LeadPages, and after a little reflection I realized that the real reason is because I’ve always used it. (And, like most people, I’m resistant to change.)
Or, rather, the effort of changing outweighs the perceived benefits of changing. Sound familiar?
The reality is that I don’t love the process of building landing pages with LeadPages. I think their builder has some quirks still, but despite those, I’ve been really pleased with the types of Landing Pages, Confirmation Pages and Thank You Pages I’ve been able to create.
Here are a few examples (and conveniently, some are lead captures of mine…):
At any rate, many of you know that I support a community as part of The OG Membership, The Monkeypod Grove.
Well, about a third of my members are Keap Partners, or Virtual Assistants, or folks who generally help other people with Keap, and earlier this week I had a member ask about the process of integrating Infusionsoft with LeadPages.
I did a few searches and most of the resources I found for her were horribly outdated, so I decided to record my own.
I thought I’d share the video here for anyone interested in using LeadPages, or just academically curious about how they integrate. Enjoy:
There are an infinite number of tools available for any small business owner – grab the Monkeypod Toolbox ebook and I’ll show you the tools and resources that have earned my trust.
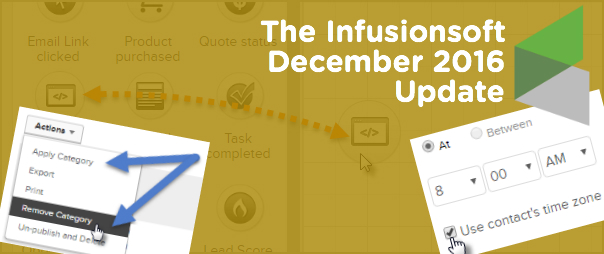
Closing out the year strong with another solid Infusionsoft update. And as you may expect, there are a few features I wanted to highlight this month that will make our lives easier. Let’s get to it:
Feature #1: Campaign Categories (Easier)
What it does: You can now add and remove your campaigns to and from categories without having to do it one-by-one. Why it matters: Campaign Categories are a recent update themselves, but in the first iteration you could only update one campaign at a time. So, if you had a list of dozens of campaigns, you’d have to go through them all, one-by-one and manually assign them to the appropriate categories. Well not anymore. As we hoped, Infusionsoft has now given us the ability to handle both adding and removing en masse.
When Campaign Categories first came out I recorded a video demonstrating what to expect and how it works, well, since this update changed a few things, I’ve gone ahead and updated my video to give you the most recent take on how this feature works and how you can use it:
Feature #2: Time Zone Timers
What it does: This update allows you to use the recipients time zone in order to schedule your campaign sequence steps. Why it matters: This matters because if you have contacts across multiple time zones, or around the world, then this means that you can have your messages show up in their inbox at the times that you know they’ll be best received. If you know that your specific audience opens email at 5:15 am, then you can make sure this message is in their inbox bright and early, no matter where they are in the world.
Caveat: Because this feature determines their time zone based on a web form submission, landing page submission, or a purchase through the shopping cart, there is a reasonable chance that you may not have time zones on record for some/most of your contacts. IF you don’t have a time zone on record, then it’ll process this step using the time you selected and the local time zone for your app (basically as it would have without this setting anyway). Furthermore, their time zone is based off of where they are when they submit your form/landing page, so hopefully they’re in their local time zone, but if they take one of those actions while traveling, it’s possible that you could have the wrong time zone on record for them.
Second Caveat: There are some circumstances where you will NOT want to use this, here’s an example: If I schedule this blog post to go live at 8:00 am Pacific US Time, and then I schedule up an email for 8:15 am Pacific Time to let everyone know that my awesome blog post is ready, well, I wouldn’t want to use the Time Zone feature because 8:15 am in Sydney happens 17 hours before it happens in San Diego, and that would mean the email was going out 17 hours before my blog post was actually live. I could see some similar concerns if you’re doing a promotion that ends at Midnight local time, etc.
Feature #3: DKIM in Infusionsoft
What it does: This gives you the ability to digitally sign your own emails, basically telling your domain that Infusionsoft has permission to send emails on your behalf. (AKA It should improve deliverability.) Why it matters: This is a fairly technical feature, but it’s one that many people have been requesting for a while. It’s mostly over my head, but recently I recorded a bonus module for my IS Starter Kit to cover setting this up, so if you’ve got the IS Starter Kit check out the bonus modules tab for a video over view, or, if you don’t have the Starter Kit course for some reason, you can learn more here.
Caveat: If email deliverability in general is over your head, and you’d like to brush up, or if you think you may have deliverability issues, there’s nothing I recommend more than The Ultimate Guide to Deliverbility from Adrian Savage at WeDeliver.Email.
Feature #4: Web Page View Goal Method
What it does: Now you can trigger or stop automation when someone visits a page on your web site. Why it matters: This is HUGE. This means that you can start or stop automation based on a contact in your database visiting a page on your website. Think about that for a moment, this means that if someone visits a check-out page and doesn’t purchase, you can send a follow up email addressing the most common objections, or offering them a discount. It means that if someone visits your FAQ page you can trigger a task for a sales rep to contact them, and on, and on, and on. The applications for this are really versatile.
Check out the recent blog article from Brett at Blick Digital for a step-by-step walk through on how to use this new feature.
Caveat: This brand new feature has already had some bugs and is currently listed on the Known Issues page. I’ve seen it work successfully, but I’ve also heard reports of people have issues with it. So, if you’re a little iffy about new stuff like this, maybe give this feature a month or two while they work out the kinks.
You may have heard me say this, but it’s worth repeating: I believe it’s our job as the user community to help guide where the product goes – and the easiest way to do that is through constructive and thoughtful feedback. If you are loving what they’re doing, tell them. And if you are concerned about something you’re not seeing, tell them that too.
Thanks for reading. Probably worth mentioning that there were a few other features packed into this release that I didn’t call out above (like Opportunities coming to the IS mobile app…). I’d love to hear which features from this update you love (or don’t love) in the comments below!
Editor’s note: It’s my pleasure to welcome back a good friend of mine, and today’s guest author – Thomas Jones. Thomas was the head of my department at Infusionsoft for a while, and before that, he was the director of the Technical Support team at Infusionsoft.
We all know what it’s like; you’re cruising along, working on some pretty cool stuff.
A tag here-
A link-click goal there-
KAPOW – Decision diamond configured
Then it happens. You get stuck, an error code pops up, or a something strange happens. What do you do?
You call support.
(I’ll readily acknowledge my bias here. I spent exactly 5 years with Infusionsoft and even spent some of that time running the support team. Having given you that disclaimer, I think Infusionsoft has some of the best support in the world.)
Even with a great support team, you’ll always have a rough experience on occasion. I wanted to give you five things you can do to give yourself the best shot at getting a great experience every time.
1. Be prepared to talk about the result you’re looking for.
Notice, I didn’t say, “Know what you’re trying to do.” Even though they’re close, they aren’t the same. I saw it all of the time; someone calls in and asks how to do something. The support person tells them, but it doesn’t produce the result the customer was looking for. The question was asked and answered, but the customer was still frustrated because they didn’t get what they needed. Do you see the difference? Sometimes the thing you’re asking to do won’t produce the outcome you’re trying to achieve.
2. Do your best to see if you can replicate the issue you’re having.
This isn’t always applicable, but when you have the ability, arm the support rep with as much ammunition to attack the problem as you can. If you’re getting an error, see if you can replicate it and save a screenshot or screencast. (You can download tools like Loom for Chrome, or jing from techsmith to create free recordings of your desktop as you retrace your steps.) The support rep absolutely wants to help you with your problem. Anything you can give them will help that happen more quickly. A note of caution, if you think something bad may have happened; don’t do this step. Just write down the things you did leading up to it. You don’t want to compound any potential issues.
(Editor’s note: It can also be helpful to do some basic trouble shooting on your own: Can you repeat the issue? Does the issue happen in more than one browser? If it’s only in one browser, can you try clearing your cache and cookies to see if that fixes it? I know how basic these things seem, but if you test these before you get on the phone/chat with support you’ll have a little more background ready to go.)
3. Treat the rep with respect.
You’re a business calling into a place of business, keep that in mind. One of my first experiences at Infusionsoft was listening to the Director of Support getting on a call and telling a customer that we’d cut him loose if he kept berating our support rep. It left a really strong impression on me. The support reps are doing their best and are going to make mistakes on occasion. As frustrated as you might get on occasion, remember it’s rarely a matter of always and never. Meaning, they don’t always suck or never know what they’re talking about. You’d be surprised how far mutual respect will go.
4. Make powerful requests.
One of the biggest problems in life is unspoken requests and assumed commitments. I could write an entire blog post on just this one, but I’ll give you an overview. Think about the difference between two people closing a conversation with, “Will you let me know what you find out?” and “Will you let me know by end of business tomorrow what you find out?” Too often we’re afraid of pushing, so we hope they know how important this is. Phrase your request so the only possible responses are yes, no, an alternative (I can’t have it by then, but how about XXX), a commit to commit (I can’t don’t know when I can have that for you, but I’ll let you know by tomorrow by 10 when I can have that for you).
Don’t leave it open ended.
(Editor’s Note: After you open a support ticket there is usually an automated email that is sent setting expectations for when they’ll get back to you, this automated email doesn’t necessarily reflect the conversation you just had. So if the messaging there is different than what the rep just told you, don’t panic. Automation isn’t always perfect.)
5. Don’t assume the answer you got was correct.
Please don’t misunderstand me. I’m not saying you should assume the answer you get is wrong. I’m simply saying, if it feels like the answer isn’t right or it doesn’t make sense, then don’t be afraid to keep looking for answers. Ask your peers, join a group, call back in, do something. I almost didn’t put this one because it’s so easy to turn this into a negative. It’s not. We all know Infusionsoft is capable of so much. There’s nobody who knows everything. I can tell you that nobody is going to think anything about you asking for a second opinion.
There you go. It always stinks when you have to call support. Not because they stink or it happens all of the time, but because it means you have to stop what you’re doing and make a call or log into the chat line. When you do have to do that, give yourself the best shot at having a great experience.
Oh, and if you invest in high quality education you may find that you wind up with fewer support inquiries altogether. Now if only we knew someone with some awesome Infusionsoft training courses…
Would love to hear any additional tips or tricks you’ve picked up along the way!
When I worked at Keap (formerly Infusionsoft) I was often asked to recommend third party tools that would solve the problems that Keap didn’t natively address, but if I’m being honest, I didn’t really use any of those tools first hand.
I avoided using them because I was representing the Keap brand, and I didn’t want to play favorites by recommending one tool over another.
So, since leaving Keap I’ve found myself gradually adopting these tools that I avoided for so long, and each time they make my life easier, I kick myself for waiting so long.
Anyway, it’s been about 18 months since I started Monkeypod and I’m proudly using PureChat, PlusThis, LeadPages, WebinarJam and a few others. (So proudly in fact, that those are all affiliate links right there. So, go nuts.)
But this blog post isn’t about those tools, it’s about Zapier.
You see, I had heard the name Zapier thrown around for so long, I was sort of embarrassed to say that I hadn’t really used it. Fundamentally I knew what it did, but I really didn’t quite “get” it. Until recently.
At it’s core Zapier is a connector. It allows two systems to pass information back and forth.
Without Zapier there are probably other ways to make these systems talk, but it’d be massively complex. Zapier makes it easy. They’ve created the connections necessary to allows hundreds of different tools to speak to one another, and Keap is one of those options.
At any rate, to help illustrate how useful Zapier has been, I want to share 3 examples from the last 6 months where I was in a sticky situation, and Zapier saved the day for me, and for ALU.
Example 1:
Scenario: Some of you know that I do some work as a consultant for a school in Africa, The African Leadership University (ALU). There’s a remote team of 7 regional reps who are all responsible for coordinating events in a particular part of the continent. These reps host events locally to talk with prospective applicants for the school, and attendees register on a sign-in sheet. After the event the reps are responsible for uploading this information to a shared google sheet so that their manager can easily see how many leads came from each event, and a handful of other details about that prospect. The problem is that these reps aren’t all users on the Keap account. So they can’t very well add them straight to Infusionsoft, I mean, they could fill out a form for each one, but then they can’t query the data or run reports on it.
Solution: Zapier allows you to sync Google Sheets and Keap. So, when a new entry is added to our master google sheet, it automatically creates (or updates) a contact in Keap. Zapier allows you to choose which columns you want mapped to which Keap field, it checks for existing contacts via email address so you don’t end up with duplicates, and it also lets you apply a tag if you want to run specific actions. Zapier officially saved us from having to purchase an additional 7 Keap user licenses (That’s $175/mo in savings at an average user license cost of $25/mo).
Example 2:
Scenario: At ALU, we have leads coming in from a variety of channels, and when these leads show up we need them to be assigned to one of 10 teams based on their country. Each team would round robin new leads between the 1-3 owners on that team. But because there are 54 countries in Africa (now you know), this was going to be a relatively complex decision diamond. And if those countries>teams>owner combinations needed to change, it would be difficult to update the round robins, and the decision diamonds, etc.
Solution: Instead of creating the decision diamond with 54 branches, we first decided to create a simple Google Sheet with all 54 countries listed, and then in the column next to them we added the “Zone” number.
Then we used a Zap so that when a new lead is added, if they have a country, it checks that google sheet to see what “Zone” that country is assigned to, then it puts the Zone Number into a custom field, and we use that Zone number to route them into a sequence where we then assign that lead to the appropriate team.
Now our decision diamond has 10 branches instead of 54, and the spreadsheet is much easier to update in case we need to rearrange how these leads are being assigned.
Example 3:
Scenario: ALU also uses Zendesk to track communication and customer service inquiries. But they use one ZenDesk account to manage their undergraduate questions, as well as inquiries regarding their School of Business. However, they use separate Infusionsoft accounts for their undergraduate programme, and their School of Business programmes. So the challenge became “How do we get the ticket information and details from Zendesk mapped to the appropriate contact in the appropriate Infusionsoft account.
Solution: Whelp, Zapier saved the day again. We were able to design a zap that is initiated when a new ticket is created in Zendesk, the first thing it does is check the School of Business Infusionsoft account to see if it can find a contact with that email address. There’s a filter in this zap so that it only proceeds IF it finds someone, and the next step is to update the contact with a tag, as well as add the ticket details from Zendesk to a custom Text Area field, so any people working on that contact can easily see their most recent ticket details listed on the contact record.
Listen everyone, I’m not pretending to be a Zapier wizard, but as my understanding of it evolves, so too does my appreciation. It’s a powerful tool.
I’m honestly not sharing these examples to brag. Heck, you may have read these examples and immediately spotted areas where I could clean them up a bit. My hope is that you’ll get a few ideas and maybe something will click where you see a way Zapier can save you time or money.
Oh, and how cool is this, Zapier actually has a bug bounty program. If you find and report a vulnerability in their software, they freaking write you a check. That’s an impressive statement for a company to make.
Hope this was useful! I’d love to hear your thoughts on Zapier, or cool ways you’re using it for your own business.
A week or two ago one of my OG members, Steve, had a question about streamlining personal communication through Keap.
He was trying to trigger a template to an individual contact, and he ran into an issue where Keap wasn’t behaving as expected, and I couldn’t really solve that specific problem, but it occurred to me that there might be an easier way to get the same result.
So, I recorded a quick video for him demonstrating the solution. I wanted to share it here in case it helps you too.
Scenario:
Sometimes you want to send a personal email to a contact, but you want to send it from INSIDE your Keap database.
This might be because you want to trigger actions when they click links, or because you want a record of the email, or maybe you just want to know if they opened it; but there are a handful of ways to send a personal one-off email from the contact record.
Unfortunately most of them are just a little bit clunky.
(Worth mentioning that depending on your needs, the Gmail or Outlook Sync might do the trick for you.)
So, here’s my proposed solution: Instead of creating a template, and grabbing that template from the contact record every time you want to use it, and then personalizing that template and sending it out.
Instead, let’s create an internal form that captures your message, use that internal form to trigger an email and merge in the message you just wrote. Bing, bang, boom.
Here are the steps:
Create a custom field (Text Area Type) for your “One Off Email Message”.
Create a new campaign, titled “One Off Email Campaign”.
Add an internal form goal to the campaign, and add the custom field from step one to this form.
Add a sequence after the internal form, titled “One Off Email Delivery”.
Add an email inside that sequence, and configure the body of the email to look however you like, adding the merge field for the “One Off Message” wherever you need it to go. (I recommend after the salutation, and before your signature/sign-off.)
Set all items to ready, and publish.
If you’re the type of person who prefers your information be delivered via in 10-minute video modules, well, buckle up, because you’ve come to the right place:
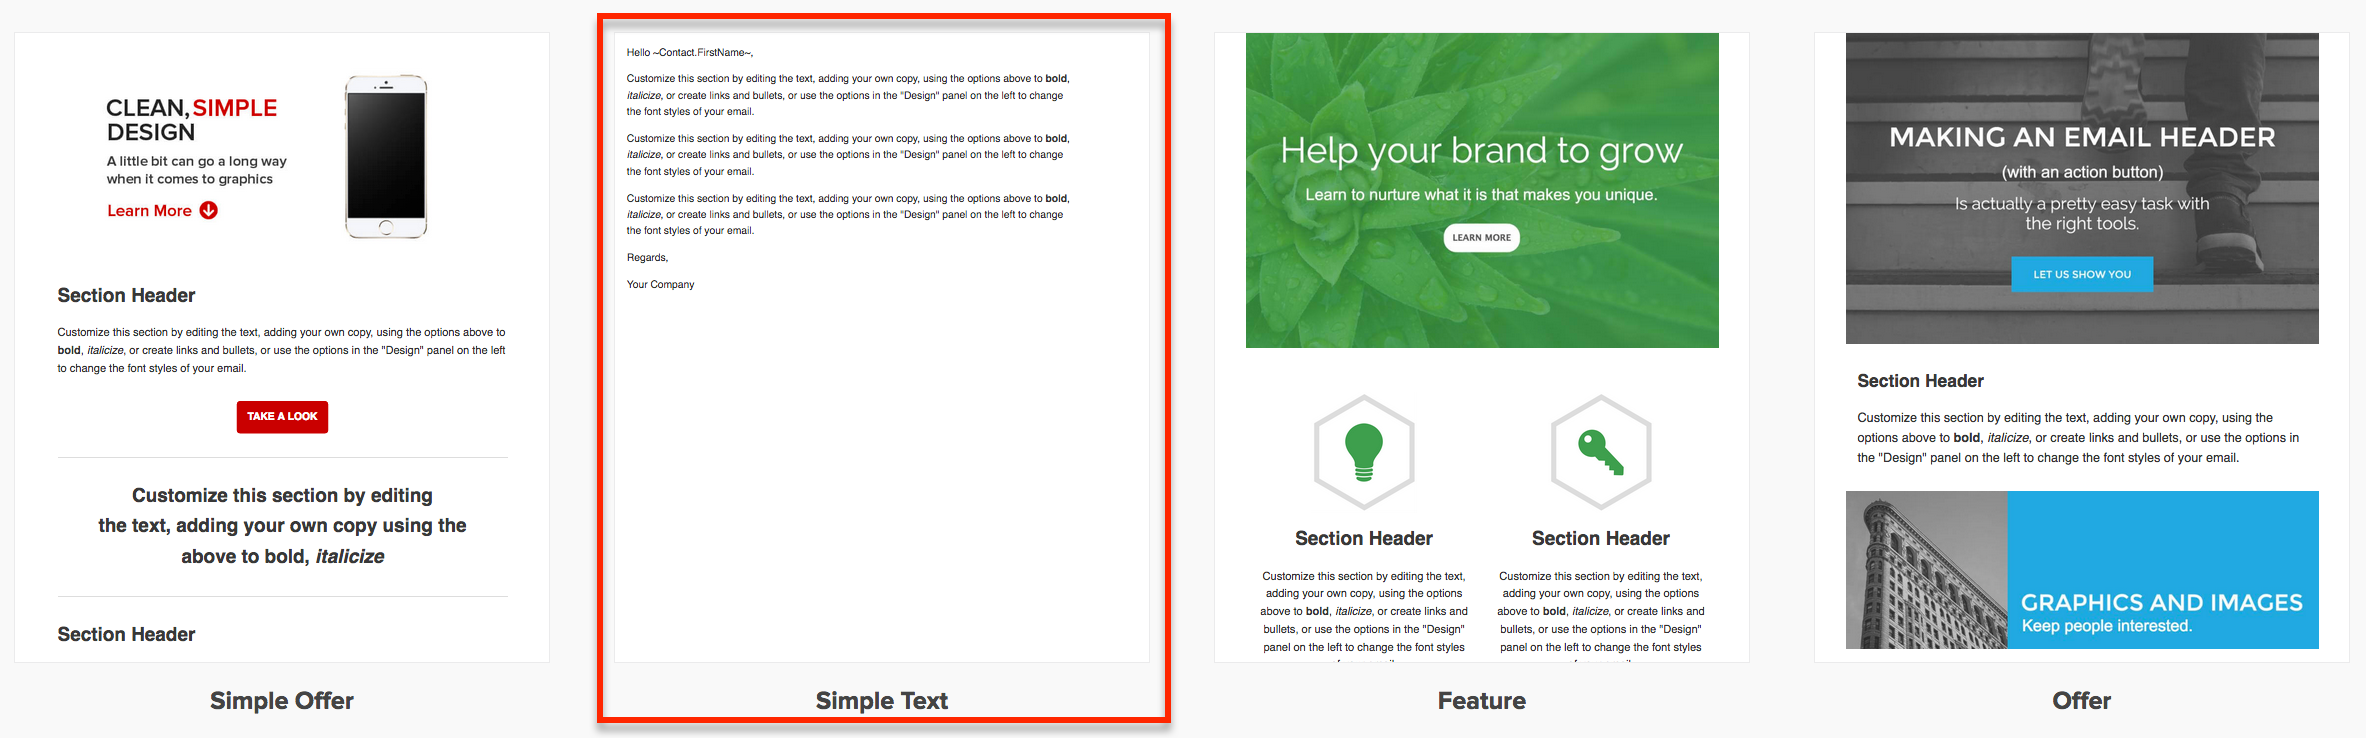
Here’s a blog post on how you can use the old builder to create a template that LOOKS like a plain text personal email. But to be honest, that’s mostly obsolete now because the new email builder has a default template for this so you can just grab and go:
Now, at the end of my video I mentioned a ninja trick for customizing this even further – if that piqued your interest and you’d like to see what else I’ve got in my bag of tricks, here ya go:
So, the above instructions basically walk you through sending an email where the entire email is custom. But sometimes you don’t want to start from scratch. Sometimes you want to grab an existing email that already has all of the information you need, and you just want to slap a different intro paragraph on it, right?
Well, all you need to do is build a handful of sequences, each holding an email with a different topic (pricing, hours, membership program, etc). And then add a radio option to the internal form so that the user can select which of your pre-crafted masterpieces to send out.
The workflow is nearly identical, but the distinction is that this new method allows you to pair your custom paragraph with one of your pre-written (and proofread, tested, refined…) templates.
That’s it for today, hope you found this useful. Leave a comment below if you made it this far!

 ontact is created, or when a specific action takes place, like a tag is applied.