Campaign Builder 101

Campaign Builder 101

Campaign Builder 101 is the beginner’s guide to understanding the campaign builder in Keap Pro, Max, and Max Classic (formerly Infusionsoft).

If you’ve never quite grasped why it’s so powerful, or you just feel like you missed the first day of class, then this is the back-to-the-basics approach you might be after.

(You can jump right to the FAQ section here)

And before we get too far into things – I want to highlight a robust three-part course on the campaign builder, the Advanced Automations Complete Collection – available for free on the Keap Academy platform.

The first thing to know is that the campaign builder can be used to do a zillion different things.

So there isn’t a singular recipe for how to use it “right”.

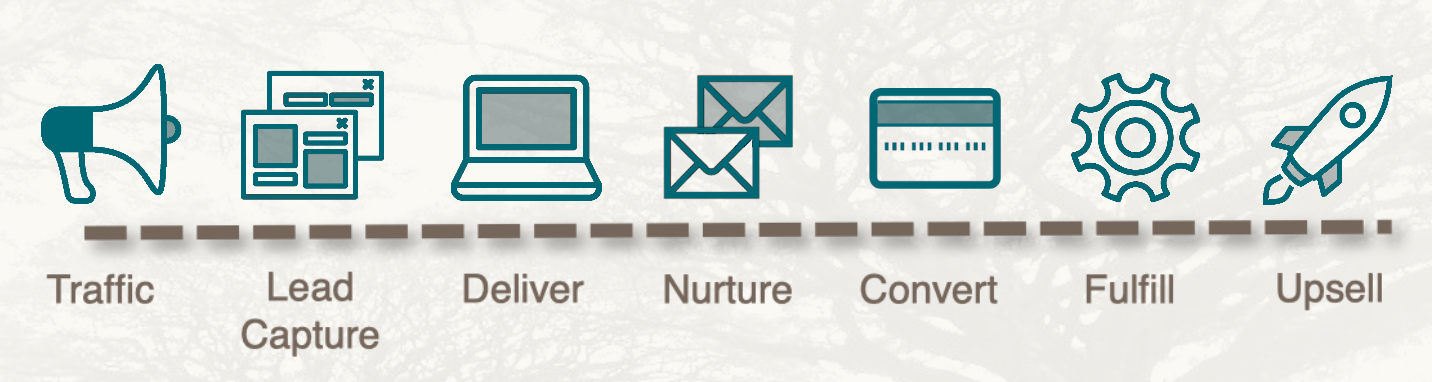
You can build lead capture campaigns, nurture campaigns, sales campaigns, webinar campaigns, fulfillment campaigns, partner campaigns, and it goes on and on – at a super high level, it works like this:

Use the campaign builder design automation that systematizes a process.

Any process.

Usually the campaigns are either a) customer facing automation, or b) internal automation, or c) some combination of the two.

(More on the campaign types here)

And while there are an infinite number of ways to use the campaign builder (I mean, literally countless business models, industries, and marketing tactics), there IS a common thread that ties every single campaign on the planet together, as least as far as Infusionsoft is concerned.

The common thread is goals, and sequences. That’s it.

Every single campaign out there, all of them, are comprised of goals and sequences.

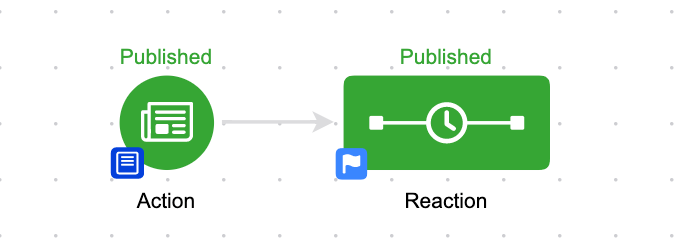
And the easiest way I know to explain it is Action and Reaction.

Goals are actions (something took place).

Sequences are reactions (what happened as a result).

The way I recommend people start with automation is to start small – find something in your business that always happens in tandem and focus on automating that.

Examples:

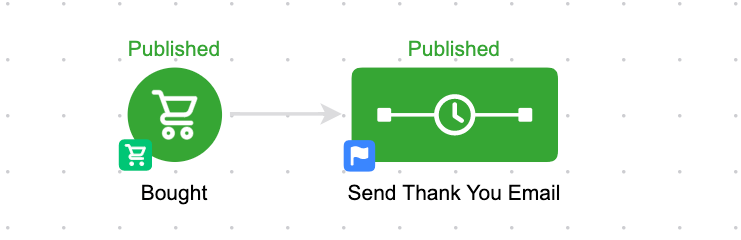
1. Someone fills out the contact us form (action), it creates a task for me to reply to them (reaction).

2. Someone buys something (action), they get a thank you email (reaction).

At the end of the day it can ALL be boiled back down to this.

Goal >> Sequence

And then as you get comfortable with that it begins to build out from there.

Goal >> Sequence >> Goal >> Sequence

GOALS AND SEQUENCES

What are goals?

Goals are the high level milestones of your campaigns, you can think of them like triggers.

As a general rule, goals serve to start the actions that come after them, and stop the actions that precede them.

The goals can loosely be divided into two categories – actions the contact takes, and actions the user takes.

Contact initiated goals are things like web form submissions, purchases, and clicks. They’re literally things that the contact has to “do”.

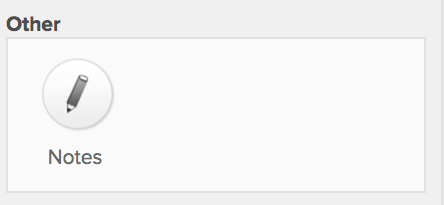
User initiated goals are things that a user does, things like applying a note, applying a tag, moving an opportunity to a new stage, or submitting an internal form.

There is a third category, which I call “system initiated”, and that’s when something happens – like, a contact’s score is recalculated and they achieve a goal by reaching the new score; or a tag being applied automatically as a result of some other automation,

Check out this help article for a comprehensive list of goals.

What are sequences?

Sequences are the “reaction”. They’re everything you want to have happen as a result of the previous goal, or to guide them to the next milestone.

But one key thing to remember is that a sequence on it’s own is just a container – it doesn’t have any default content. You use a sequence to assemble the actions you want to have happen, and to define the order you’d like them to take place.

Most people think of sequences as “email sequences”, and while that is the most popular use case, you can also use steps in a sequence to automatically apply a tag, apply a note, create a task, add someone to a fulfillment list, send an http post, and a variety of other actions.

For more on sequences, check out this help article.

Okay, so you start with the action (the goal) and then you bundle it with the reaction (the sequence).

From there, you build your campaigns action >> reaction, or, goal >> sequence.

From there you can continue to use sequences to guide your prospects from milestone to milestone.

Goal >> Sequence >> Goal >> Sequence

And as you build these automation “snippets” (which I call “automated moments”) what begins to happen is you can weave them together to created automated journeys.

The journey is the path the customer takes – from discovering your brand, to opting in, to becoming a customer, to getting the thing they bought, to buying again, and to telling their friends, etc.

This is where it starts to get complicated – because there are so many permutations, exceptions, and variables.

They can all be addressed, but not necessarily predicted.

I would imagine it’s like learning an instrument – you don’t start by learning all the songs.

You start by learning the notes.

And once you know the notes, you can play the chords.

And once you know the chords, you can play the songs, or write them.

(I have no musical talent or ability, so admittedly that may not be how it works.)

Same thing for learning language, you start with the alphabet – you learn the building blocks you’re going to use.

There’s a joke I like that goes:

“Once you’ve read the dictionary every other book out there is just a remix.”

It’s true for campaigns – once you know how goals and sequences work you can digest any campaign (no matter how big, or sprawling, etc).

The goals are the high level milestones.

And the sequences are what happens in between those milestones – either as a result of the previous goal, or in preparation of the next one.

I don’t wanna downplay the campaign builder’s power, but I like to emphasize that while you can build complicated and intricate campaigns, you certainly don’t have to.

(Though if you do, I blogged about three “gotchas” to be aware of – Gotcha 1, Gotcha 2, Gotcha 3)

How big should my campaigns be?

This is an common Campaign Builder 101 question – as you build out your automation when does it end? At what point should one big campaign turn into two smaller ones?

The answer depends on who you ask, but I find that there are usually some natural breaking points where the conversation shifts, or you hit a natural milestone.

Here’s a blog post from Mike Harris talking about the idea of compartmentalizing your campaigns.

The key thing to remember is that you can transition contacts between campaigns automatically by using tags and tag goals.

For most people automating simple bite-sized pieces of automation is all they really need in order to start seeing an ROI.

I find that the more time you spend in this space, the easier it is to get distracted by all the things it could do; and I think it’s safe to say that entrepreneurs don’t need any additional distractions.

So my rule is this:

Prioritize what is necessary over what is possible.

Not bad, right? (Yeah, go ahead and tweet that.)

Sometimes this means focusing on the more repetitive mundane parts of your business, rather than launching a new lead magnet; but sometimes it means launching a version one of your campaign just to get it live – even when you know there’s more you’d like to add to it in the long run.

It’s easy to get overwhelmed when you think about technology, and layering automation into your business – but it can be reassuring to boil it back down to the basics.

Goal >> Sequence

Action >> Reaction

If you can wrap your head around that then you can build campaigns all day long.

Remember – the campaign builder is just a tool.

And like any tool, it’s dependent on the person using it, and the blueprint they’re following.

What do I do next?

The campaign builder is powerful, and versatile, and using it is critical to maximizing what Keap does for your business.

If you’re wondering where to go for more, you can browse the tools and features available in the campaign builder for free by checking out the articles in the Keap help center. There are loads of them, and plenty of users have carved their own path this way.

But if you’re the person using it – or you plan to be, and you’re looking for a more linear approach then check out the technical training in my three-part CB: Trilogy course. This course starts with the basics, and builds through to decision diamond branching, sequence settings, and advanced campaign configuration.

Now, if you’re already comfortable with “how” the campaign builder works, and you want to spend more time on the strategy aspect, or just need a place to ask questions when things go off the rails, then I recommend checking out the OG Membership.

Campaign Builder 101 – FAQ

What do I build?

Start by mapping out the journey you want your customers to take, and then try and use automation to bridge the gaps between the high level milestones you’ve identified.

Read more on mapping the customer journey here.

Got any examples?

Looking for example campaigns that you can build? That’s tough, because campaigns are often very specific, but here are a few that nearly every business needs.

Can I edit a campaign I've published?

Yes.

Launched doesn’t mean finished.

You can absolutely edit a campaign that you have already published – in fact, you almost always will.

Launching a campaign is often times an exercise in letting go of control – at some point you need to acknowledge that it may not be absolutely perfect, but it’s time to get it live.

And once your campaign is live you may start seeing areas where you could improve it, and that’s okay too.

Campaigns are living breathing things, and part of what makes them so powerful is the ability to add to them, refine them, or tweak them over time.

Now, that being said, modifying a live campaign with people in it can have some unexpected consequences – check out this article on what to expect when republishing campaigns.

How do I test campaigns?

Whether you’re a complete novice or a savvy pro, testing campaigns is important.

Here’s a video tutorial on testing your Keap campaigns so that you can launch with confidence.

Can I pause a campaign?

Yes and no.

No, as in, it’s not a native feature.

Yes, as in – sort of. It’s not really pausing but you can create a similar result (temporarily remove contacts and then add them back in), but I hesitate to recommend this because it’s rarely worth the effort.

Here’s the video overview.

The 3 Campaign Status Types?

A contact can have three statuses as it pertains to a campaign sequence.

Active: this means a contact is in a campaign sequence and there are steps scheduled

Queued: this means a contact is in a campaign sequence, and they have completed the steps in their current sequence but have not advanced

Done: this means a contact was in a campaign sequence but is no longer, because they have either achieved a goal and moved on, progressed naturally into another sequence, or been removed manually

More on this here.

Got any tricks to simplify this stuff?

Great question – yes.

Here’s a trick for copying goals and sequences (within a campaign, or across campaigns) to save yourself some repetitive effort.

And here’s a trick for re-centering a campaign that has gotten lost off screen.

TYPES OF CAMPAIGNS

External Automation

External automation is the stuff that the customer sees – it’s the the landing pages, the emails that go out, the text messages you trigger (through a third-party service), and anything else that the customer directly interacts with.

If a customer signs up for your newsletter, and they receive a welcome email, or a copy of your most recent newsletter – that’s an example of customer facing automation.

Another example would be a customer who purchases one of your courses, or joins your coaching program – and then they receive the on-boarding series, access to the course, or instructions on how to schedule their first call.

External automation probably makes up the majority of use cases for the campaign builder – but if that’s all you use the campaign builder for you’re missing a piece of the puzzle.

Internal Automation

Internal automation is the stuff that needs to happen internally – it’s can impact the customer journey, but it’s often “behind the scenes”.

An example might be when an employee submits an internal form to record details about a prospect who called in – and as a result it creates an opportunity, tags the prospect, and assigns it to a sales rep for follow-up. The customer doesn’t know that any of that took place, but the automation is making sure no one drops the ball.

More often than not internal automation is used to supplement the customer experience – to streamline an internal process, or to help with transparency, or accountability.

Internal automation doesn’t get nearly as much attention as traffic, lead capture, and sales – it’s just not as sexy to talk about, but it can be every bit as valuable.

And the beauty is that you don’t have to choose – you can and should use the campaign builder for internal and external campaigns; in fact, that’s the one of the big keys to maximizing the ROI you get from automation in your business.

Testing Keap Campaigns

Testing Keap Campaigns

If you spend a bunch of time and effort building a Keap campaign you’re proud of, it can be really tempting to proudly hit the publish button and go make yourself an old timey malt.

But even the most experienced campaign wizards have been burned a time or two by launching without properly testing.

This is, at least in part, because Keap (formerly Infusionsoft) doesn’t make it all that easy to test campaigns. There isn’t a “test mode” or staging environment – once you publish, it’s just live.

So here’s my process for testing campaigns (specifically in the Max Classic version of Keap – formerly known as Infusionsoft), hope it helps:

1. Publish the campaign

Before you can properly test any campaign elements, they’ll need to be in “ready” mode, and the campaign will need to be published. Some campaign elements (web forms, emails, etc) do have their own “test” feature, but these built in test components use information from your User record, and so they often won’t give you the actual contact experience.

2. Add yourself to the campaign

If the entry point to the campaign is a goal that you can achieve, then simulate achieving that goal by applying the tag, or submitting the form. You’ll want to verify that the entry point goal functions as you expect.

Pro-tip: If you’re using Gmail then you can add a +extension to your own email to create infinite testing versions. For example, greg@monkeypodmarketing.com becomes greg+campaign1test1@monkeypodmarketing.com

If you can’t achieve the entry point goal, or there is none, then add yourself to the campaign manually.

3. Verify that steps have scheduled properly

To do this, navigate to the contact record, scroll to the bottom half, find the campaigns tab, and check the Recent Campaign History, and Upcoming Campaign Items.

Recent Campaign History should show the goal you just achieved, and possibly any steps that were set to run immediately (if they’ve processed), and Upcoming Campaign Items should show any steps scheduled for the future.

4. Manually process upcoming items

Once you’ve verified that the campaign steps have scheduled at the interval you intended (and you’re not sending 50 emails on the same day, etc), then you can manually process the scheduled steps, and verify that the automation is working as you’d expect.

Check to see that tasks are created, tags are applied, emails are sent (and formatted properly), etc.

5. Advance through the campaign

Once you’ve tested the initial automation you can progress this contact through the campaign by achieving whatever the next goal is; refresh the Campaign reporting tab, and then repeat steps 3 through 5.

Pro-tips:

Isolate and test third-party integrations. Just because the automation worked in Keap doesn’t necessarily mean it created the intended outcome in the other system.

Test and retest decision diamond logic. It’s nice when a decision diamond works the way we expect, but make sure you run multiple test contacts through it to test the different criteria and logic combinations.

How do I pause an Infusionsoft Campaign?

How do I pause an Infusionsoft Campaign?

It seems like “How do I pause an Infusionsoft campaign?” is a question that I hear every month or so.

It’s a fair question, and there are plenty of circumstances under which you’d want to pause a campaign – but the sad reality is that the campaign builder doesn’t have an elegant “pause” function.

This leads to a some people thinking that it can’t be done. Which isn’t entirely true.

It IS possible, it’s just not very clean – and rarely is it worth the extra effort.

So, I need to be really clear – I am not recommending that you do this for all your campaigns (please don’t).

But if you’ve got a specific situation where you have a campaign you’re building, and you KNOW you’re going to need to pause it (during an event, or over the holidays, etc, etc), then let me show you the structure and process required to pause a Keap campaign.

The demo above was built using Keap Max Classic (which was called Infusionsoft at the time), but this same approach would work for Max, Pro, or any version of Keap with the campaign builder.

Note: If you’re the type of person who wants to see the second part of this process where I demonstrate some advanced strategies you can layer in, then check out the Part 2 bonus video on my Monkeypod YouTube Channel.

Web Page Automation Goal (A to Z)

Web Page Automation Goal (A to Z)

The Keap Web Page Automation Goal was introduced in December of 2016 (back when Keap was called Infusionsoft).

This new goal for the Campaign Builder made an already powerful tool, even better.

Effectively this goal allows you to trigger something in your Keap campaigns when a contact visits a page on your website.

It’s a tactic larger brands have been using for a long time, and I was thrilled to see it make it’s way into the campaign builder that we know and love.

I’ve got a video today that’s going to show you how I use this goal to build a Cart Abandonment Follow-Up campaign, and then a few tweaks I recommend to solve for repeat visitors, or to limit the audience.

But before we dig into that, I wanted to mention a few other resources you may find valuable:

  • If you want the click-step instructions for how to use this goal, here’s the help article from Keap.
  • If you want a more detailed look at why this goal is important, and a handful of use cases where it might fit in your business, I recommend this post by my friend Brett over at Blick Digital.

I think the most obvious use case for this goal is to follow up with contacts who visit a sales page on your website, but don’t end up signing up.

This goal allows you to capture that buying moment, and help encourage those customers to sign up by offering additional value, answering questions, or addressing their concerns. The ability to interact with someone at such a pivotal juncture is really powerful.

After I walk through the basic campaign design and functionality, stick around as I put on the afterburners and adapt it for a few advanced scenarios:

The demo above was built using Keap Max Classic (which was called Infusionsoft at the time), but this same approach would work for Max, Pro, or any version of Keap with the campaign builder and this goal method.

Note: The Web Page Automation goal can only be achieved if Keap knows who the web page visitor is – and can find a corresponding contact record for that person.

So, for this to work, the visitor needs to have been cookied – meaning that Keap can track them. There are a few ways for a contact to be cookied, but here are the most common:

  • Clicks a link in an Keap email
  • Submits a Keap web form
  • Submits a legacy Keap landing page
  • Checks out through an Keap order form or the Keap shopping cart

More details here from the original release notes.

Tag Goal Hack

Tag Goal Hack

Tag goals are one of the most popular ways to trigger automation in Infusionsoft’s campaign builder, no doubt about that.

Tag goals are pretty simple to understand – you define which tag(s) they’re listening for, and then boom, any time any of those tags are applied, the goal is achieved and the actions you’ve built out are set in motion.

Sometimes you need a goal to listen for more than one tag, and that’s easy enough. For example, this goal would be achieved if any of the 5 listed tags are applied.

That’s all well and good if you want the resulting actions to run when any of those tags are applied, but what if you only want the goal to be achieved if ALL of those tags exist on the same contact?

That’s a scenario I’ve seen from time to time, and more frequently as of late.

Personally, I’d love it if Infusionsoft added a setting to this goal which would allow us to specify if we wanted it to listen for any or all of the tags we designate.

But for the meantime, here’s what you can do as an work-around.

Free Infusionsoft Campaign Note Templates

Free Infusionsoft Campaign Note Templates

Update: There’s a new section at the bottom of this post with some fancy animated notes you can swipe.

At some point or another all new Keap users ask about the notes widget in the Keap campaign builder.

In a sense, they’re useless. They don’t actually have any function, and don’t actually affect the campaign in any meaningful way.

But, in another more accurate sense, the more you build campaigns, the more you realize just how valuable they can be.

You can use these notes to leave messages for other users, to store links you’re using, color codes you may need, lists of things you still need to do, or just to log changes you’ve made so another user knows what has been done and what hasn’t.

The content from today’s blog post was shared in the Monkeypod Membership area by a member, Brian Johnson. I absolutely love little tricks like this that help keep your campaigns neat and tidy, so I asked for his permission to share this as a blog post, and he happily agreed. Thanks Brian, you rock!

By default, the note widgets aren’t as useful as they could be.

But you have quite a bit of control over the appearance of K campaign Notes. All it takes is a little HTML code.

What? You don’t know the first thing about HTML?

Fear not!

Changing the appearance of campaign Notes is as easy as copying a short line of code from this Notes Templates file and pasting it into a Note in your campaign. That’s it. You now have a nice, custom-styled Note.

Yellow
----------------------------------------
<div style="background:#fffae6;font-size:14px;line-height:1.3;color:#292929;text-align:left;border:1px solid #fae6be;padding:20px;">xxxxxxxxxx</div>


Blue
----------------------------------------
<div style="background:#ebf5fa;font-size:14px;line-height:1.3;color:#292929;text-align:left;border:1px solid #d2dce1;padding:20px;">xxxxxxxxxx</div>


Green
----------------------------------------
<div style="background:#faffe6;font-size:14px;line-height:1.3;color:#292929;text-align:left;border:1px solid #dce6be;padding:20px;">xxxxxxxxxx</div>


Red
----------------------------------------
<div style="background:#fff0eb;font-size:14px;line-height:1.3;color:#292929;text-align:left;border:1px solid #ffd7cd;padding:20px;">xxxxxxxxxx</div>


Gray
----------------------------------------
<div style="background:#f7f7f7;font-size:14px;line-height:1.3;color:#292929;text-align:left;border:1px solid #ebebeb;padding:20px;">xxxxxxxxxx</div>


White Background with Grey Border
----------------------------------------
<div style="font-size:14px;line-height:1.3;color:#292929;text-align:left;border:2px solid #cccccc;padding:20px;">xxxxxxxxxx</div>

The templates file provides six different Notes style options, plus instructions for creating bold text and headings.

Screenshot of Improved Infusionsoft Campaign Note Examples

You may choose to use background colors to signify the subject matter in Notes. For example: blue for Notes that document information about the campaign; red for important, time-sensitive reminders like tasks that need to be completed before publishing or changes that need to be made; yellow for general reminders, or instructions for team members / clients, or things to consider implementing in the future; etc.

How to Use the Notes Templates

It’s best to open the Notes Templates TXT file in a text editor. Your computer should have a factory-installed text editor like Notepad or Notepad ++ (PC), or TextEdit (Mac). Avoid opening the file in a word processing program like Word — it’s not that big a deal, but using a text editor will ensure line and text spacing doesn’t get messed up.

Let’s get started.

  1. Open a campaign and drag the Notes element onto the campaign canvas.
  2. Delete the placeholder text ‘Lorem ipsum dolor sit amet.’ The Note should now be empty.
  3. Select one of the templates from the Notes Templates file, copy it, and paste it into the Note in your campaign.
  4. Double-click on the placeholder text ‘xxxxxxxxxx’ in the Note to select it and enter your text.

That’s it. Resize the Note and move it around the canvas just like you normally would.

Make Changes to the Notes Templates

You can use the Notes templates as a starting point for creating your own Notes styles.

Let’s take a look at each individual piece of the HTML in the templates to understand what the code does and how you can edit it.

First, a quick comment about colors. Colors in the Notes templates are HTML HEX values — the three or six characters after the hashtag (#). To change a color you’ll need to know the HEX value of the color you want. If you don’t have a graphics program that uses HEX values, w3schools.com has an HTML Color Picker you can play around with to find HEX color values.

Background Color

The default background color of a Note is white #fff. Each Notes template has a different background color. To change the color edit the six characters after the hashtag (#).

background:#fffae6;


Border Color

By default Notes don’t have a border. Each Notes template has a different border color. To change the color edit the six characters after the hashtag (#).

border:1px solid #fae6be;


Font Size

The default font size in Notes is 12px. The Notes templates set the font size to 14px. To change the font size edit the number.

font-size:14px;


Line Height

Line height is the space between the lines of text. The default line height in Notes is 1.2. The Notes templates increase line height to 1.3, giving a little extra breathing room between lines to improve legibility. To change the line height edit the number.

line-height:1.3;


Font Color

The default font color in Notes is black #000. The Notes templates change font color to #292929, which should be plenty dark for most people. If you want to change the font color to black, you can delete the following code or change it to ‘#000’.

color:#292929;


Text Alignment

Text is centered by default in Notes. The Notes templates left-align text. If you want the text centered delete the following code.

text-align:left;


Padding

Padding creates space between the text and Note borders. Notes don’t have any padding by default. To change the size of the padding edit the number.

padding:20px;


Style Some Text in a Note Differently

All the code talked about to this point applies styles to the entire Note. You can also apply styles that only affect some of the text in a Note.

When pasting the following code into a Note, make sure you don’t delete any of the code that is styling the entire note — i.e., this code goes between the <div> tags where your Note text is.

Bold Text

To make text bold place an HTML strong tag before and after the text you want bolded. Be sure to include the backslash in the ending strong tag.

Creating <strong>bold text</strong> is easy.


Headings

To create headings an HTML span tag is placed before and after the text. Be sure to include the backslash in the ending strong tag. To change the size of the heading edit the number.

<span style=”font-size:18px;”>Large Heading</span>


And that’s really all you need to know to start using the swipe content to make your Keap campaign notes a little sexier. My hope is that this makes your life easier, your documentation clearer, and your campaigns more effective, and if it does, give Brian a shout out on twitter to say thanks!

Animated Note Swipes

If the plain text note templates aren’t eye catching enough for ya, here are some fancier notes you can swipe that will produce a little bit of movement on your campaign canvas.

Bouncy Green

To create these I basically just downloaded a campaign from the Keap/Infusionsoft Marketplace, and then copied the code they had in their notes – changed a few colors, and voila.

Bouncy Green

<div class="info-box-1"> <p> <!--//////////////////////////-->Remember to treat yo'self when this campaign produces results that exceed your wildest expectations.<!--//////////////////////////--> </p> <div class="wrapper"> <span class="bounce_arrow-1"> <div class="arrow-guide-1"> <svg xmlns="http://www.w3.org/2000/svg" xmlns:xlink="http://www.w3.org/1999/xlink" width="36" height="27" viewBox="0 0 36 27"> <defs> <path id="b" d="M29.667 8c0 8.1-6.567 14.667-14.667 14.667S.333 16.1.333 8 29.667-.1 29.667 8z" /> <filter id="a" width="134.1%" height="148.2%" x="-17%" y="-19.3%" filterUnits="objectBoundingBox"> <feOffset dy="1" in="SourceAlpha" result="shadowOffsetOuter1" /> <feGaussianBlur in="shadowOffsetOuter1" result="shadowBlurOuter1" stdDeviation="1.5" /> <feColorMatrix in="shadowBlurOuter1" result="shadowMatrixOuter1" values="0 0 0 0 0 0 0 0 0 0 0 0 0 0 0 0 0 0 0.1 0" /> <feOffset dy="1" in="SourceAlpha" result="shadowOffsetOuter2" /> <feGaussianBlur in="shadowOffsetOuter2" result="shadowBlurOuter2" stdDeviation="1" /> <feColorMatrix in="shadowBlurOuter2" result="shadowMatrixOuter2" values="0 0 0 0 0 0 0 0 0 0 0 0 0 0 0 0 0 0 0.2 0" /> <feMerge> <feMergeNode in="shadowMatrixOuter1" /> <feMergeNode in="shadowMatrixOuter2" /> </feMerge> </filter> </defs> <g fill="none" fill-rule="evenodd"> <g transform="translate(3)"> <use fill="#000" filter="url(#a)" xlink:href="#b" /> <use fill="#37B273" xlink:href="#b" /> </g> <path fill="#F0F0F0" d="M18 0c.631 0 1.143.512 1.143 1.143v10.955l4.906-4.906a1.143 1.143 0 0 1 1.616 1.616l-6.857 6.857a1.143 1.143 0 0 1-1.616 0l-6.857-6.857a1.143 1.143 0 1 1 1.616-1.616l4.906 4.906V1.143C16.857.512 17.37 0 18 0z" /> </g> </svg> </div> </span> </div> </div> <style type="text/css"> .info-box-1 {width: auto; margin: 12px; padding: 0px 18px 2px 20px; box-sizing: border-box; line-height: 40px; display: inline-block; border-radius: 14px; box-shadow: 0 1px 3px 0 rgba(0, 0, 0, 0.1), 0 1px 2px 0 rgba(0, 0, 0, 0.2); background-color: #37875E; } .info-box-1 p {color: #ffffff; text-align: left; font-size: 16px; font-family: "Proxima Nova", sans-serif; font-weight: normal; font-stretch: normal; font-style: normal; line-height: 1.4; letter-spacing: normal; } .arrow-guide-1 {width: 100%; margin-left: 0px; margin-top: -6px; } .wrapper {width: 100%; } @keyframes bounce {0%, 100%, 20%, 50%, 80% {-webkit-transform: translateY(0); -ms-transform: translateY(0); transform: translateY(0) } 40% {-webkit-transform: translateY(-8px); -ms-transform: translateY(-8px); transform: translateY(-8px) } 60% {-webkit-transform: translateY(-6px); -ms-transform: translateY(-6px); transform: translateY(-6px) } } span.bounce_arrow-1 {position: absolute; -webkit-animation-duration: 2.6s; animation-duration: 2.6s; -webkit-animation-fill-mode: both; animation-fill-mode: both; -webkit-animation-timing-function: ease-in-out; animation-timing-function: ease-in-out; animation-iteration-count: infinite; -webkit-animation-iteration-count: infinite; color: white; } span.bounce_arrow-1 {animation-name: bounce; -moz-animation-name: bounce; } </style>

Bouncy Blue

<div class="info-box-1"> <p> <!--//////////////////////////-->Remember to treat yo'self when this campaign produces results that exceed your wildest expectations.<!--//////////////////////////--> </p> <div class="wrapper"> <span class="bounce_arrow-1"> <div class="arrow-guide-1"> <svg xmlns="http://www.w3.org/2000/svg" xmlns:xlink="http://www.w3.org/1999/xlink" width="36" height="27" viewBox="0 0 36 27"> <defs> <path id="b" d="M29.667 8c0 8.1-6.567 14.667-14.667 14.667S.333 16.1.333 8 29.667-.1 29.667 8z" /> <filter id="a" width="134.1%" height="148.2%" x="-17%" y="-19.3%" filterUnits="objectBoundingBox"> <feOffset dy="1" in="SourceAlpha" result="shadowOffsetOuter1" /> <feGaussianBlur in="shadowOffsetOuter1" result="shadowBlurOuter1" stdDeviation="1.5" /> <feColorMatrix in="shadowBlurOuter1" result="shadowMatrixOuter1" values="0 0 0 0 0 0 0 0 0 0 0 0 0 0 0 0 0 0 0.1 0" /> <feOffset dy="1" in="SourceAlpha" result="shadowOffsetOuter2" /> <feGaussianBlur in="shadowOffsetOuter2" result="shadowBlurOuter2" stdDeviation="1" /> <feColorMatrix in="shadowBlurOuter2" result="shadowMatrixOuter2" values="0 0 0 0 0 0 0 0 0 0 0 0 0 0 0 0 0 0 0.2 0" /> <feMerge> <feMergeNode in="shadowMatrixOuter1" /> <feMergeNode in="shadowMatrixOuter2" /> </feMerge> </filter> </defs> <g fill="none" fill-rule="evenodd"> <g transform="translate(3)"> <use fill="#000" filter="url(#a)" xlink:href="#b" /> <use fill="#4368C7" xlink:href="#b" /> </g> <path fill="#F0F0F0" d="M18 0c.631 0 1.143.512 1.143 1.143v10.955l4.906-4.906a1.143 1.143 0 0 1 1.616 1.616l-6.857 6.857a1.143 1.143 0 0 1-1.616 0l-6.857-6.857a1.143 1.143 0 1 1 1.616-1.616l4.906 4.906V1.143C16.857.512 17.37 0 18 0z" /> </g> </svg> </div> </span> </div> </div> <style type="text/css"> .info-box-1 {width: auto; margin: 12px; padding: 0px 18px 2px 20px; box-sizing: border-box; line-height: 40px; display: inline-block; border-radius: 14px; box-shadow: 0 1px 3px 0 rgba(0, 0, 0, 0.1), 0 1px 2px 0 rgba(0, 0, 0, 0.2); background-color: #6586DA; } .info-box-1 p {color: #ffffff; text-align: left; font-size: 16px; font-family: "Proxima Nova", sans-serif; font-weight: normal; font-stretch: normal; font-style: normal; line-height: 1.4; letter-spacing: normal; } .arrow-guide-1 {width: 100%; margin-left: 0px; margin-top: -6px; } .wrapper {width: 100%; } @keyframes bounce {0%, 100%, 20%, 50%, 80% {-webkit-transform: translateY(0); -ms-transform: translateY(0); transform: translateY(0) } 40% {-webkit-transform: translateY(-8px); -ms-transform: translateY(-8px); transform: translateY(-8px) } 60% {-webkit-transform: translateY(-6px); -ms-transform: translateY(-6px); transform: translateY(-6px) } } span.bounce_arrow-1 {position: absolute; -webkit-animation-duration: 2.6s; animation-duration: 2.6s; -webkit-animation-fill-mode: both; animation-fill-mode: both; -webkit-animation-timing-function: ease-in-out; animation-timing-function: ease-in-out; animation-iteration-count: infinite; -webkit-animation-iteration-count: infinite; color: white; } span.bounce_arrow-1 {animation-name: bounce; -moz-animation-name: bounce; } </style>


Caveat: I’ve swiped this code from smarter folks than myself – so unfortunately I can’t assist with modifying it, or troubleshooting if it stops working at some point. Good luck!

Advanced Customization

Speaking of folks smarter than myself, here’s a video from another Keap Partner, John Borelli, where he walks through some fancier options you can use to make your campaign notes really sing.

Campaign Builder Finishing School

Here’s a short video from my Campaign Builder Finishing School series where I talk a little more about this idea. If you want to check out the whole series, you can get access here.