Conditional Content for Infusionsoft

Conditional Content for Infusionsoft

Update: If you have questions about using Dynamic Content then check out this Facebook group that started specifically as a place to share ideas and use cases for this feature.

Say what? Conditional content for Infusionsoft?

Yup. Big news sport fans. BIG news.

For a long time, dynamic email content has been one of the most requested features – and it’s finally happening.

If you’ve ever wanted the ability to send an email to a group of people, and have different sections display based on what tags someone had, or what value was in a custom field – well, it’s coming.

Introducing Conditional Content for Infusionsoft

Conditional content, aka dynamic content, aka liquid content is on the horizon (like, coming this year).

They’re still ironing out the details for how it’ll be accessed in the app, but I’ve been playing with a version of it and it’s slick. The potential behind this fuctionality is massive.

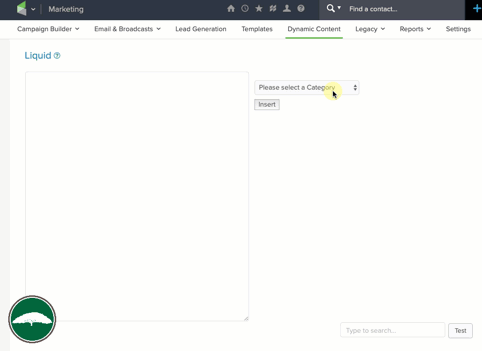
Here’s how it works:

It’s basically shortcodes for emails.

So if you’ve ever used shortcodes, like maybe inside a membership area – then this might feel familiar.

They’ve created a short code buider that allows you to set up the syntax you want – then you can copy and paste it into whatever email you want.

The process for generating the shortcodes is a little clunky at the moment – and I could definitely see that being a barrier for folks who want to adopt this.

But I suspect they’ll smooth that out over time, so for now – just focus on the potential behind this feature.

The ways it can be used seems to be divided into two main categories.

Conditionals and Modifiers

Conditionals decide what content to show to which recipients.

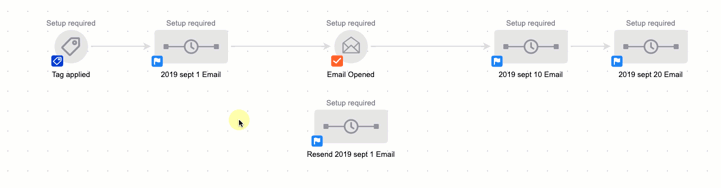
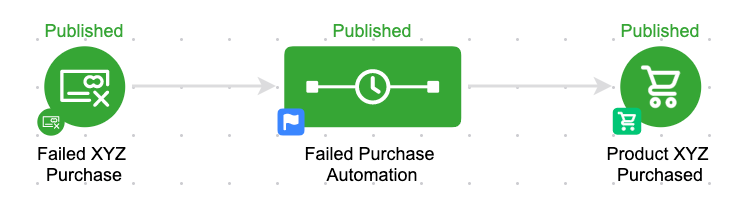
For years the only way to get different messages to segments of your audience was by building an email, in a sequence – the cloning that sequence, tweaking the new version of the email, and using a decision diamond to route contacts into whichever one made sense for them.

But now, with liquid content, you can build one email and use shortcodes to control which pieces of content are displayed for which recipients.

You can hide a call-to-action from anyone who has already bought that product, or deliver an update knowing only your active members will see it – the possibilities are vast.

Brilliant, right?

Lemme show you how this works:

And that’s just the conditional display portion, there’s more…

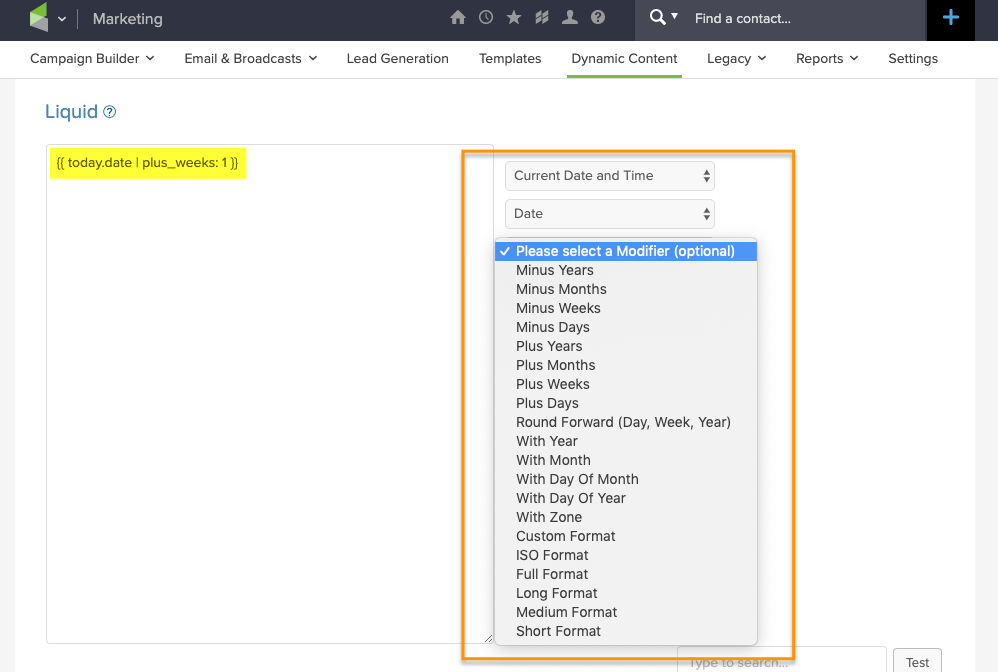
Introducing Modifiers

Modifiers allow you to tweak or adjust the copy – so, if you wanna merge in someone’s name but you want to switch it to all upper case, YOU CAN.

(…or lower case, Or Proper Case)

If you want to merge in a multiple of someone’s reported revenue – yup, ya can.

You wanna merge in a date, but automatically dial it forward a week, month, or a year – yup, yup, yup.

Exciting stuff, right?

Fun fact: When this feature is released it’ll check off another item from this old blog post wishlist I wrote.

When will this be available?

Obviously I’m not an official spokesperson for the company, but everything I’m hearing indicates conditional content for Infusionsoft emails should be available in the next month or two. Update: Release of this feature was pushed back until Q1 of 2020.

What are the drawbacks?

Honestly, I’m stoked for this – so I don’t wanna take anything away from that.

That said, it will definitely need to be easier to use – I imagine I’ll get used to building the shortcodes, but the copy/paste over into an actual email process feels…clunky.

And the other primary drawback I noticed was that it only seems to work with text – which is a great start, but longer term it’d be great if we could use this same concept to hide/display the other email elements (like buttons, images, etc). Though, worth noting that this syntax DOES appear to work with the HTML section, so that opens up some flexibility for images.

It CAN be used to hide/reveal images, buttons, or other email assets, check it out:

Real World Use Case

He’s a real world use case from my buddy Jordan Hatch – in this scenario he’s using Liquid to reformat a date he wants to insert into an email so that it’s easier to read – using this method instead of the previous one allows him to achieve the same result more quickly, and without requiring a second custom field.

Here are the links he mentioned in the video:

Now, I won’t pretend that I’ve got this whole thing figured out, my brain is still running through scenarios for how and where conditional content for Infusionsoft can be used, but the exciting part for me is two-fold; first – I’m stoked about this specific feature, it’s going to make a lot of things possible that previously weren’t.

Second, and perhaps even more importantly, I’m excited about what this represents – it’s a significant release that represents commitment to the long term development of Infusionsoft, and I know that should go without saying – but my relationship with Infusionsoft has been a little strained lately and features like this are exciting to see.

Anyway, would love to hear your thoughts and ideas in the comments below!

Basic Photo Editing

Basic Photo Editing

I’ll be the first to admit that I’m far from a graphic designer.

But last month I got a reply from one of my OGs (shout out to Jason) who was impressed by an image I had cobbled together.

And that doesn’t happen very often – in fact, this might be a first.

So I recorded a quick tutorial for Jason showing him my process – then, today I found myself recreating that same image for a second round of the same webinar (more on that below) and I thought “Hey, maybe I should record this in case it helps other people.”

And voila – here we are. Enjoy.

For professional images you’ll probably need something more sophisticated than what I’ve laid out here, but if you’re in a bind and just need something simple, then I hope this helps.

Feel free to share this with someone you think it can help, or take me to school in the comments below with your own graphic design tips and tools.

No Decision Diamond Needed

No Decision Diamond Needed

I’ve said it before and I’ll say it again, the Keap Decision Diamond is my Achilles heel.

(Heck, it’s why I wrote this blog post about simplifying them using cascading logic.)

But this blog post isn’t about decision diamonds, in fact, it’s about scenarios where you should avoid them.

No Decision Diamond Needed

Keap decision diamonds are great when you either want one scenario to happen, or another.

(as a reminder, Keap is the platform formerly known as Infusionsoft)

They’re perfect for segmenting people so you can speak to them differently, based on what you know about them.

Decision Diamond Spotlight

In fact, here’s a robust blog post answering seven of the most important questions about Keap decision diamonds.

But there are scenarios in the campaign builder where I see people try to branch campaigns into different sections based on whether or not someone has taken an action, and that’s where things start to get complicated – because what if they take that action after you’ve already segmented them.

Have a look at this video where we run through a few examples and how to simplify these campaigns:

The key take away here is that because we know that goals advance people in a Keap campaign, we also know that someone who has not advanced must not have achieved that goal – and we can build our automation accordingly.

Let’s take a closer look at a few examples.

Example 1:

In this scenario we’ve got a campaign designed to trigger an SMS message (through a third party add-on tool), and then we have two possible outcomes.

We want one thing to happen if the message is sent successfully, and something else to happen if it isn’t sent successfully (like, say, attempt to resend it).

Now, if you take out the SMS bit this a bit it’s actually a really common scenario.

But remember, campaign goals not only start the automation that comes after them – but they also stop what comes before them.

So rather than building the second attempt in as it’s own outcome, we can actually bake any second or third attempts right into that original sequence because we know as soon as the SMS message is successfully sent, the contact will jump right to that point in the campaign.

This next example is variation of the first – but instead of working with SMS, we’re now talking about Email.

Example 2

The situation is this – we’ve got an email going out, but it’s an important one, so we want to make sure everyone sees it.

The question becomes how can we automatically resend it to people who haven’t opened the email?

The answer is probably less complicated than people think.

Rather than use an Infusionsoft decision diamond to branch contacts into those who have or haven’t opened the email, you can actually just build your second (and third, fourth, etc) email attempts right into that original sequence – because the minute the contact achieves the goal downstream any automation preceding the goal would stop.

Caveat: I should also point out that you should use this particular tactic (and the Email Open Goal in general) with caution.

Email opens are kinda a sketchy metric, they’re dependent on how the recipient’s email client reports information back to Infusionsoft, so it is possible to report an open when the contact didn’t read the email, and possible for the email to be read without reporting an open.

K decision diamonds are incredibly powerful, and I hope you found this post valuable – please leave any comments or questions you have below.

And if you want to get to know the campaign builder better, check out the Advanced Automations Course in the Keap Academy Platform.

One Day Launch Experiment

One Day Launch Experiment

Context:

K – so this lil experiment came about because I had been intending to record an evergreen webinar, but somehow the project had been on my to do list for over a year.

I had the tools, and the experience – but for one reason or another I just wasn’t prioritizing it (sound familiar?).

So I decided to tackle it – and to prove a point (or punish myself?) I committed to doing it in a single day.

This blog post is a deconstruction of that entire experiment, from the prep, to the execution, to the lessons we learned, and the people who made it happen.

The Launch List:

In preparation for this project I made myself a launch checklist – and then it occured to me that others might want that too – so I published it as it’s own blog post (here’s the checklist).

I timed it so the checklist blog post would go live the day before the experiment was scheduled – that served two purposes, a) it gave people the list so they could follow along, or build their own webinar, and b) it gave me an extra chance to plug the actual launch day experiment and livestream.

For the live experiment I turned the checklist into this handy-dandy collection of post-it notes:

The only things we prepped ahead of time were the checklist, and the actual presentation material (like, the outline for what we planned to record).

And that part was really only because it was a presentation I had delivered for SuccessCon 2018 (called “Basic to Baller: Tactics for Leveling Up Your Infusionsoft Campaigns”).

The Tools:

There are a bunch of webinar tools out there, I won’t pretend to have used them all, but for the last year or so Demio has been my platform of choice for a number of reasons. And since Demio also offers an evergreen option, that’s what we used for this project.

Here are the other tools we used in this project:

[Back to Top]

Content Strategy:

This might be my favorite part of this project.

So, we were setting out to create an evergreen webinar, right? And normally that’d be the end of that, and when you’re done you get to share the webinar you just created.

But a theme of mine lately has been trying to find ways to get additional mileage out of my efforts – so rather than just creating the webinar, we wanted to see how else this project could be valuable. If we’re doing to do the work, then we wanna make sure we’re maximizing the return we get on our efforts.

Here’s what we came up with – in addition to producing the webinar (1), we also write the checklist blog post (2), livestreamed the process from start-to-finish (3), produced a recap video (4), and wrote this blog post breaking down the entire project (5).

That’s five pieces of content from the one project, and I’m not counting the various social posts plugging those different assets. Not bad, right?

I guess my point is that different people might be interested in different parts of this project – and the same thing might be true in your business.

What ways could be getting extra mileage out of your existing efforts?

[Back to Top]

Launch Day:

I knew I’d need a little help with this, so I coordinated with Myke, Josh, and Bret, and the four of us picked a day where we were all available.

Bret was in charge of managing the livestream, and making sure he had the content he needed to produce the summary video.

Here’s the full livestream >>

And here’s the summary video >>

Josh and Myke were there to help with the actual implementation.

The only “work” I did ahead of time was creating an itemized plan of attack – I opened a google sheet and listed out all of the things I thought we’d need to build, including what tools we’d use, and who would be responsible.

Remember that physical “to do list”? As we completed individual tasks throughout the day we moved the ceremoniously peeled the post-it notes off. (surprisingly satisfying, I might add)

The other headstart I have to acknowledge was that we were working with content I had already presented once.

We’d still need to update it, record it, and edit it – but we didn’t need to build that out from scratch and that’s a big deal, because organizing your webinar content can be quite a hurdle.

Once the livestream kicked off I dove right into recording and editing the content, and Myke and Josh worked on setting up the webinar in Demio, creating the registration and thank you pages, and building the Keap campaign.

The editing took the bulk of the time, by far.

So Josh and Myke took off once their work was done, and Bret did his best to keep the livestream entertaining.

Then, after a light and breezy 8-hours – all the assets were built and tested and we were ready to launch. The day concluded with Bret pressing publish on this Facebook Ad to start telling people about the webinar.

[Back to Top]

The Final Webinar:

This was the second automated webinar I’ve created and so I made one big change in terms of how I prepared this one – instead of recording the automated webinar first, and then cutting it into individual chunks for the post-webinar page, I decided to record the individual chunks, and then stitch them together for the complete webinar.

Here’s why this matters – one of the biggest drawbacks of an automated webinar is that your viewers might feel held hostage, so I like to give people the ability to exit the webinar and watch the content at their own pace on the thank you page; so I designed that piece first, and then assembled the individual clips into the large webinar recording.

This made it easy for me to record – because instead trying to find natural points where I could clip out the content, all I had to do was record an intro and outro, and then insert transitions between the individual clips.

The Recap Video:

I’m no fool – I know no one wants to watch an 8-hour livestream, no matter how majestic and inspiring it may have been.

So I hired Bret to distill the recording into something more digestible, and not to diminish his video alchemy – but *poof*, here ya go:

Another important thing to note here is that we went into this knowing we were going to produce a summary video, so that allowed us to capture footage or have conversations that would make future Bret’s life easier once he got into the editing room.

[Back to Top]

Lessons Learned:

This was a fun project, and I’d definitely chalk it up as a success.

We did what we set out to do – but, that doesn’t mean everything went swimmingly. We definitely learned a few things along the way.

1. Look for layers in your content
It would have been easy enough to just record the webinar and put it out there, in fact that’s what I think most people do.

But if we had just done that we’d really only have served people who wanted to polish up their Infusionsoft campaigns (the topic of the webinar). By recording the process and documenting our experience we were able to broaden our audience and provide valuable content for people who are interested in creating an evergreen webinar – or who want a behind the scenes peek at building the campaign to support one.

2. Plan the Livestream
This is definitely something I think we could have done better – we knew we wanted to livestream the whole thing, but we underestimated how long the editing would take, and since a livestream of me editing video might actually be boring enough to kill someone, I wish we’d have coordinated some content to help with engagement.

If I were doing this again (and we might), I’d have come up with different topics, or had some other folks come by for Bret to interview during the livestream (Parks and Rec telethon style).

3. Set Goals
Our goal was really just to see if we could do this, and we did – but I wish I’d have set more specific goals for how long it would take, and then more importantly what type of a business impact this project would have (new leads, new sales, etc).

This one feels obvious in hindsight, but when we started this project I was coming at it from a content creator’s perspective. I wanted to be valuable, which is fine – and I think it was, but I could have also given more thought to exactly how it would serve Monkeypod.

[Back to Top]

Results:

I mentioned that this wasn’t a very “goal oriented” project from the onset, but I thought I should share some numbers for those of you who like numbers (even modest ones).

The first thing I’ve noticed, and am encouraged by – is that 80% of registrants are actually showing up for the webinar (compared to normal webinars which are generally less than 50% show rate).

I also noticed here are that 100% of registrants who chose on-demand are showing up, this makes sense since their session can start immediately – but it’s nice to see it validated with 20 out of 20 (admittedly, a small sample).

Finally, 54% of those who show up for the webinar are staying through completion – I was surprised by that as well, because I am literally giving people an “escape hatch” to leave the webinar after a few minutes.

Shout Outs:

Gotta give a ton of love to Josh, Mychal for their work on this, and Bret for playing producer, and masterfully editing the recap video..

If you are interested in seeing more of Bret’s video production and editing skills I recommend checking out his YouTube channel. His last couple videos have been on fire.

(Oh, and for the dog people among us, here’s a 4-minute masterpiece he edited together using clips Sara and I shot with our cell phones during our road trip last month.)

I mentioned the tools we used above, but having the right people on your team is a huge factor in the success of any project. Happy to vouch for those three dudes if you find yourself needing any of their respective talents.

Keap’s Failed Purchase Goal

Keap’s Failed Purchase Goal

Listen up campaign builders – we’ve got a brand new goal method, introducing Keap’s Failed Purchase Goal.

The Failed Purchase Goal

The idea that we can trigger automation when someone attempts to purchase and is unsuccessful isn’t new, but this new goal method allows us a more direct path for starting and stopping automation inside the campaign builder.

The goal has three options for when it will trigger, either on any failure, failure of a specific product, or failure for any product within a category.

The “any purchase” option doesn’t feel as useful to me simply because the automation you trigger wouldn’t be able to be as targeted as with the other two.

As with other campaign goals, once achieved contacts will be added to the sequence following it.

This campaign structure is obviously pretty basic, but it’s what goes inside the Failed Purchase Automation sequence that will need your attention.

If the automation you configure is designed to follow up with the buyer over time, then you’ll also want to make sure this campaign has a conclusion goal so that it automatically stops when they successfully buy.

Check out the video below as I build a sample campaign and address a few of the most common questions I’ve heard on this feature.

Oh, and the section of the video from 10:45-14:00 is no longer necessary. You can skip that sequence/task altogether.

Update: In July 2021 Keap made a change to how failed orders are handled, which simplifies the campaign structure recommended in the video about.

Simply put, failed orders no longer create an open balance. Read about the change here.

FAQS

Is this just for initial purchases?

No.

In my tests I’ve found that this goal method is also achieved when a recurring subscription payment isn’t able to process – another reason to be careful when using the “Any Purchase” option.

Can I use billing merge fields?

No.

If you need to use the credit card or order merge fields then you’ll want to stick with the options in Billing Automation.

(Want the Billing Automation presentation that I accidentally uploaded to my personal YouTube channel?)

This new goal method opens the door for lots of automation opportunities, the trick is to start looking at what is currently happening when someone tries to buy and isn’t able to – and then asking “What should be happening?”

At the very least you might want to add a step that sends them the link to the sales page – but for higher ticket items it might make sense to task a human to reach out and help facilitate the transaction.

If I missed anything here, or you have any questions, please feel free to leave them in the comments below.

AppointmentCore and Infusionsoft

AppointmentCore and Infusionsoft

I wanted to cover another popular solution when it comes to scheduling tools that work with Infusionsoft – but it’s been a while since I had any real world experience with AppointmentCore, so I turned to a few friends of mine who use this tool daily.

I asked the questions I thought would help you understand what AppointmentCore is, why it’s valuable, and decide whether or not it’s a fit for your business.

Big thanks to Francis Jones (KHJ Consulting), Mike Harris (GoldFixe Solutions), and Moshe Gotfryd (Maximind.ca) for their contributions below.

What is AppointmentCore?

Francis: “It is an online scheduling software. It allows your audience to find a convenient time to talk with/meet you without having to do the ‘does this date and time work for you’ dance.”

Mike: “AppointmentCore is a powerful scheduling tool that is specifically for Infusionsoft. It allows you to tie your business and personal calendars together so you’re never double-booked. It can then capture contact information, payments, and trigger automation when someone books, reschedules, and/or cancels.”

Moshe: “AppointmentCore is the easy way for clients and co workers to schedule your time”

Who should use AppointmentCore? (…and who shouldn’t)

Francis: “It is for any business that has a desire to give their customers and prospects an option to schedule time with them. The only businesses I have worked with that don’t find it helpful are businesses that schedule appointments all over the place and therefore can’t reliably use it for scheduling. For instance, a pest control company that does appointments all over town. If he or she lets me book an appointment on my own, how will the system know when it’s ok to open up the next time slot. There are too many variables.”

Mike: “AppointmentCore is for Infusionsoft customers who have an ongoing need to schedule appointments (virtual or in-person). It’s not for people who do not use Infusionsoft as their primary CRM. It is also not for people who are easily frustrated with slow software.”

Moshe: “AppointmentCore is for Infusionsoft users who want to leverage automation and simplicity in driving bookings for any type of meeting.”

What are your favorite Appointmentcore features?

Francis: “I love that it syncs to Infusionsoft and let’s me apply tags to run actions. It will also let me populate custom fields. I love the “Make me look busy” feature. I also love the buffers before and after an appointment. I love that I can create as many calendars as I need. I know other tools do some of those things as well, but those are the things I like about Appointmentcore.”

Mike: “No limits to number of appointment links you can make. Easy to fire automation via tags for each appointment type. They have built in email and SMS reminders. You can make booking links for multiple team members where only one team member needs to be available or you can require that all team members listed attend. Perfect for round-robins as well as client transition meetings and interviews. It check all users calendars and only serves up the times where everyone is available.”

Moshe: “- The appointment link knows who is booking, so you don’t end up with duplicate contacts.
– Flexibility for any scheduling need
– Merge fields into Infusionsoft
– Trigger API calls or apply tags for appointments that need it, or create a link with no integration to infusionsoft at all – no matter your need there is an easy quick solution.”

For a complete list of the AppointmentCore features, check out this page on their site.

What are Appointmentcore’s drawbacks?

Francis: “I sometime have a hard time linking it to a calendar. It can be a pain sometimes. The user interface is a little dated, although that doesn’t bother me nearly as much as other people I talk with.”

Mike: “It is soul-crushingly slow when you are setting anything up or just navigating between pages as a logged in user. So slow that it can easily discourage new users who are on their free trial to bail and use another software. You can ask custom questions on the booking form but cannot map them to Infusionsoft custom fields. No expiring/single-use scheduling links.”

Moshe: “There are a lot of features, and setting things up for the first time might take some exploration and trial and error. That being said, they have a great support team, and you can get all the help and advice you need in the Monkeypod private group. The community is powerful!”

How does Appointmentcore Pricing work?

Francis: “The pricing is competitive. To be honest, the real reason is I recommend it over the others is that the others make you pay to add integrations with Infusionsoft. Yes, Calendly is $8 a month, but to add the Infusionsoft integration is $20 (or whatever). I hate. I loathe ala cart pricing.”

Mike: “It’s tiered by a range of users (1-2, 3-5, 6-10). A lot of competitors will charge per user instead of a range. However, a lot of competitors offer a lower rate per user but you often will need a connector (like Zapier) to send the information to Infusionsoft. If you’re already paying for Zapier (or PlusThis), it might be wise to use a more inexpensive (but great) tool like Calendly.”

Moshe: “AppointmentCore scales with you. Starting at $27 for two users, $47 for 5 users, and $87 for 10 users.”

Here’s a look at the pricing from the AppointmentCore website:

How does the connection to Infusionsoft work?

Francis: “I thought it was really easy to set up and it has worked quite well for me. To be fair, I haven’t used it for anything gangster. Whatever I need it to do, it has done without any issues.”

Mike: “It works great for the transferring of basic contact info as well as the appointment information. All the automation is caused by tags when someone schedules, reschedules, or cancels. You can add multiple tags to each of these actions to trigger multiple automations. As mentioned earlier, even though AppointmentCore allows you to capture custom fields on the booking form, those fields cannot be mapped to Infusionsoft custom fields. They only appear in the confirmation email that AppointmentCore sends. Sometimes when you add tags in Infusionsoft they don’t appear right away in AppointmentCore. I’ve fixed this a couple different ways; from logging out then back in up to disconnecting Infusionsoft and reconnecting (not recommended).”

Moshe: “It natively connects with Infusionsoft so there is no need for something like Zapier to make things work. I like to leverage the custom merge fields and api calls instead of using the tags and default merge fields.

There are some cool things you can do if you introduce Zapier to the mix. I replace the appointment description with custom fields and person notes from the contact record. I also update the appointment with “Confirmed” in the title if they confirm their attendance.”

Another big thank you to Francis, Mike and Moshe for sharing their insights in this post.

If you’re curious about some of the other scheduling options, check out this post on Calendly, or this one on Acuity.