Build an Email Preferences Center in Keap

Build an Email Preferences Center in Keap

So, a few years ago I published a blog post demonstrating how you could build an email preferences center in less than 16 minutes (read the post), and a few years later the concept here is still the same – but the tools have changed a little bit.

And before we get started, I should say that PlusThis has introduced a feature that handles this in a cleaner and more powerful way – you can read about that below.

Alright then, now just to be clear – we’re talking about setting up a preferences portal that allows your Keap subscribers to manage their own email preferences

This tactic is a total win:win – it allows contacts to select which types of communication are most important to them, so they’re not seeing stuff from you that they don’t care about; and it helps ensure that you’re only sending them emails they actually want, which will encourage engagement, and help improve deliverability.

Anyway, it’s easy, it’s a good idea, and it doesn’t require any fancy third-party tools or ninja customization  – the thing to “gotcha” for this process is that while this allows your subscribers to automatically tag and un-tag themselves, removing a tag doesn’t automatically stop automation – so, it’s still our responsibility to respect the preferences that our subscribers express.

The demo above is built using Keap Max Classic (which was called Infusionsoft at the time), but this same approach would work for Max, Pro, or any version of Keap with landing pages.

Note: You may have noticed that I’m using tag goals to trigger the follow-up processes, instead of just using a decision diamond to put contacts in the right sequence – if you’re wondering why, it’s because the new landing page builder options aren’t available yet for decision diamonds.
So, instead, we’re raising tags on the different selections, and then using the tags to trigger goals and launch the automation. It’s an extra step, but it achieves the same result.

PlusThis Solution

If you have PlusThis, then you’ll be pleased to hear they have an Email Subscription Manager tool that lets your recipients manage the types of content they receive.

Here’s their blog post about it.

And if you don’t yet have PlusThis, you can take it for a test drive with a free trial here >>

How do I pause an Infusionsoft Campaign?

How do I pause an Infusionsoft Campaign?

It seems like “How do I pause an Infusionsoft campaign?” is a question that I hear every month or so.

It’s a fair question, and there are plenty of circumstances under which you’d want to pause a campaign – but the sad reality is that the campaign builder doesn’t have an elegant “pause” function.

This leads to a some people thinking that it can’t be done. Which isn’t entirely true.

It IS possible, it’s just not very clean – and rarely is it worth the extra effort.

So, I need to be really clear – I am not recommending that you do this for all your campaigns (please don’t).

But if you’ve got a specific situation where you have a campaign you’re building, and you KNOW you’re going to need to pause it (during an event, or over the holidays, etc, etc), then let me show you the structure and process required to pause a Keap campaign.

The demo above was built using Keap Max Classic (which was called Infusionsoft at the time), but this same approach would work for Max, Pro, or any version of Keap with the campaign builder.

Note: If you’re the type of person who wants to see the second part of this process where I demonstrate some advanced strategies you can layer in, then check out the Part 2 bonus video on my Monkeypod YouTube Channel.

Scheduling Dynamic Email Broadcasts

Scheduling Dynamic Email Broadcasts

Keap (formerly known as Infusionsoft) sends emails in primarily two ways – broadcasts, and campaigns. Campaigns are their own thing, they’re powerful, robust, and they can completely revolutionize the way you do business.

If you haven’t wrapped your head around the campaign builder yet, you’re missing out on some really powerful opportunities. Stop what you’re doing and check out this Campaign Builder 101 blog post you won’t regret it.

But broadcasts have their benefits too. They’re quick and easy.

If inspiration strikes, and you want to reach out to your peoples, then the last thing you need is a dozen extra steps between you and lovin’ up on your audience.

But broadcasts have one major drawback, and from time to time I see it catch people off guard. (Okay, they might have more than one drawback, but this one is definitely the biggest.)

When you schedule a broadcast, you are scheduling it to the group of people who meet the criteria at the TIME you schedule it. Not at the time it sends.

Say what?

Yeah, so let’s say you have 670 blog subscribers, right?

And you want to send out a message to those people.

So you hop into Keap all confident like, and you compose a poetic masterpiece that your blog subscribers are gonna share the shiz out of (natch).

But it’s Sunday at 1:00 pm, and Monday’s a holiday, so you don’t want that email to go out until Tuesday at 8:00 am or so. That’s a perfectly normal request, right?

And broadcasts allow you to schedule for a date in the future, so that’s no problem. Right?

Wrong.

You see, if you schedule an email on SUNDAY to go out on TUESDAY, then the people who sign up in between will not get that email.

When you schedule a broadcast it pulls the list of recipients at the time you schedule it. And it locks it down. Static. Stuck. No beuno.

You can see why that might be a problem, right?

Once in a while us entrepreneurs get all motivated like and we line our ducks up and want to schedule three or four emails for the next few weeks – but the problem with broadcasts is anyone new who signs up in that window (between scheduling and sending) won’t get the new hotness.

So, what do we do?

Well, the fix is simple, lemme show ya:

Automate Recurring Live Events

Automate Recurring Live Events

If you run regular recurring events, then I think I can make your life a little easier.

Here’s how most businesses I work with handle repeating live events:

  1. Build out campaign for event 1
  2. Copy campaign for event 2
  3. Adjust email copy, and campaign timers for event 2
  4. Repeat for event 3, event 4, etc.

And heck, maybe you’ve even used campaign merge fields, and campaign links to make your life a little bit easier.

But this process is still heavily manual, and a little tiring. Right?

Right. So, I think I can make things a little easier for you, and your monthly workshop, or your meet-up every few weeks.

Let’s jump right in, shall we?

Context:

If you are promoting a live event then you likely want to put the date in the email(s) to your contacts, right? Totally normal request.

The way most people handle this problem is to use the campaign merge field.  Campaign merge fields are managed centrally on the campaign level, so if you have to make a change, you only need to go to one place to update the date and it will automatically use the new value for every email that was using that merge field.

This is especially helpful when you’re copying the campaign too, because the campaign merge fields are all copied too, so you can use the same structure and quickly update the merge fields to save yourself time.

But even if you update the campaign merge fields, you still have to manually go through and adjust all the date timers for the new event, and for some people this is a dealbreaker.

So, I’m going to show you how you can set the campaign and never need to touch it (as far as dates are concerned).

Scenario:

You are advertising on Facebook for your live event.  You have 4 events coming up in Jan and Feb.

<!-- [et_pb_line_break_holder] --><center><iframe src="https://www.youtube.com/embed/NfYlIK7x-7E?rel=0&showinfo=0" width="560" height="315" frameborder="0" allowfullscreen="allowfullscreen"></iframe></center>

Let’s Build:

Before the campaign:

For this campaign you’re going to need to set up an Event Date custom field (the field should be a Date Type), and then you’ll also need one tag, we use “Date Set” as the tag name.

The campaign structure:
  • Create a goal to trigger the campaign.  In this case I used a tag as a goal for when people register for the event from Facebook.
  • Create a Date Picker Sequence. (We’ll talk about what’s inside next)
  • Create a Event Date Set Tag Goal
  • Create an Event Reminder Sequence. (We’ll talk about this one in a moment too)

This is how your campaign structure should look:

Simple right? The magic happens inside the sequences. Let’s take a closer look at what is happening under the hood:

 Inside the Date Picker Sequence:
  1. Use a new start element for every event date
    (The first date timer should range from the date you will start the ads up to the date before the event. We are not going to let people register for this event on the day of, yet.  For now, if they sign up on the day of the event, they will be registered for the next event.)
  2. Add a Set Field Value widget and add the date of the event
  3. Apply the Date Set tag.

On the second Start element, add a new date timer that runs between the start date of the first event and the day before the next event.  Then repeat steps 1-3.

Here’s how the inside of the Date Picker Sequence (highlighted in yellow above) will look:

Each of the individual “tracks” inside the sequence should look like the image below:

And here are the important things to note about this:

  1. The date range timer should include all dates leading up to the first event, but you can adjust the cut off date if you want last minute registrations to automatically be registered for the following event. So, choose a range that accommodates based on your own preference.
    (Each “track” in this sequence will have a different date range, and they should not overlap.)
  2. The “Set Field Value” is the widget responsible for recording the Event Date into a custom field on the contact record, this is important because it will be used in the next sequence to control the delivery of reminders.
    (Note: The first track would have the date of event one, the second would have the date of event two, etc.)
  3. This is the “Event Date Set” tag, and this will be the same for each track in this sequence. This tag is important because once the custom field has been updated with the event date, this ensures that the contact is extracted from the sequence by achieving the Tag Goal attached to it.
Inside the Reminder Sequence:
  1. Add the Confirmation email and merge in the Event date
  2. Use a field timer with the event date.  Be sure to choose the option – “Use year from field”
  3. Add a reminder email to let people know when the event is approaching.
  4. Add another field timer, followed by another email, for as many reminders as you’d like.

Here’s how the inside of the Event Reminders Sequence (highlighted in blue above) will look:

———–

Okay, that’s about the size of things. You should now have a functional campaign designed to automatically assign registrants to the next upcoming event, and then send reminders as the event approaches.

One benefit of this campaign is that you can set it up for as many events as you have scheduled, so if you know the event dates for the next 6 months, you can build it out, launch, and you shouldn’t have to do any real upkeep to make sure things are current.

Hope this helps lend some automation to your recurring live events! If you have any questions, please feel free to comment below, or reach out to me directly!

Editor’s Note: Kevin’s solution is great, but it got me thinking about fringe scenarios where this might not be a good fit, so I recorded a quick video to demonstrate how you can adapt this to allow registrants to sign up ON the day of the event, or to allow them to choose their date of registration, and some automation to address what happens if people sign up after your events have taken place.

Here you can create the content that will be used within the module.

<iframe src="https://www.useloom.com/embed/72c95faf415142a68e02dcc53cf0c9b6" allowfullscreen="allowfullscreen" width="630" height="394" frameborder="0"></iframe>
Infusionsoft Landing Page WordPress Plugin

Infusionsoft Landing Page WordPress Plugin

(Disclaimer in the May 2019 Edit: This plugin is no longer available)

One of the big criticisms about Infusionsoft’s new landing page builder is that it wasn’t easy to host these beautiful new pages on your own domain. For some folks, that was as showstopper.

But if you’re a WordPress user, then David Bullock might just be your new favorite person.

He built a plugin for WordPress that makes hosting the new Infusionsoft Landing Pages on your own domain really simple. It’s a slam dunk.

Note: This plugin is no longer available, so the corresponding demo was removed from this post.

Update: Sadly, as of May 2019 the original developer of this plugin can no longer continue to support it. See this post for their recommendations on a possible workaround.

The Zombie Autopilot Pipeline

The Zombie Autopilot Pipeline

A bit of backstory for you.  

This post chronicles the journey I went through to convince a couple of skeptics (my family) that Infusionsoft’s Sales Pipeline Component isn’t an unreasonable, hunk of junk, waste of time.

Let me tell you what I did wrong when creating a Sales Pipeline for my family business. Yeah, egg on my face. I’m putting this out into the world so you dear reader, don’t get any egg on yours.

And then what I did right.  Read this, and it won’t matter if you’re building pipelines for your own business or for your clients, you’ll be able to do it right from the start.

————————–

I learned Infusionsoft four-ish years ago by implementing apps and campaigns on our new-at-the-time family remodeling business.

My mom and husband are owners, and they were my test subjects. I start here because there’s a different dynamic to implementing new technology when your co-workers are your family. Grumbling about change is a little more pronounced when you’re related by blood or a vow. Understatement of the year?

The Sales Pipeline feature in Infusionsoft is wonderful when you have a situation where you are having one-on-one sales conversations with prospects. Typically, these are higher ticket items that require a longer sales process. Home remodeling = Perfect Fit. Lots of 1:1 conversations. High-ticket items. Long sales cycles. By definition, it’s the perfect tool. (Editor’s note: And if you may need more than one pipeline, no problem. Read more here.)

Now, here’s the beginning of how things went wrong for me.

In my attempt to get the team all aboard the Sales Pipeline Express, I originally built a Pipeline that would make your grandma say “hot damn!”. (Sounding good so far, right?)

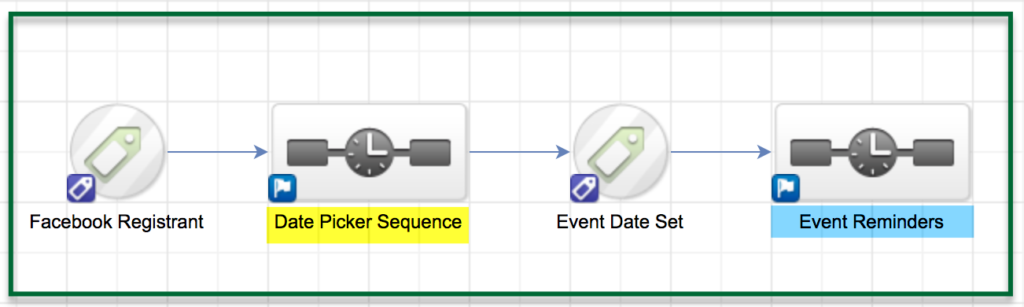
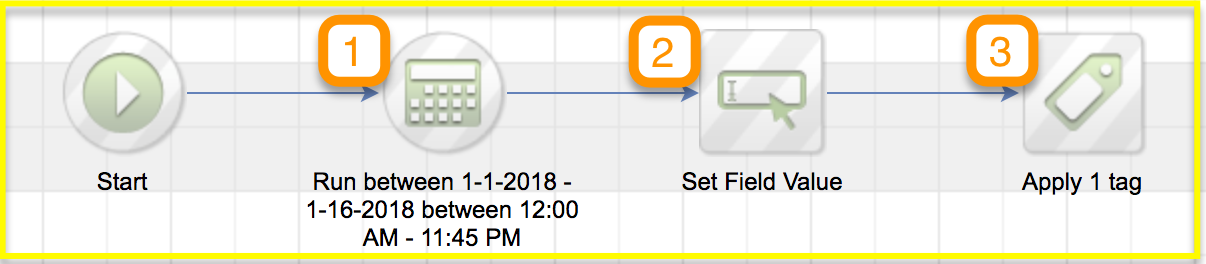
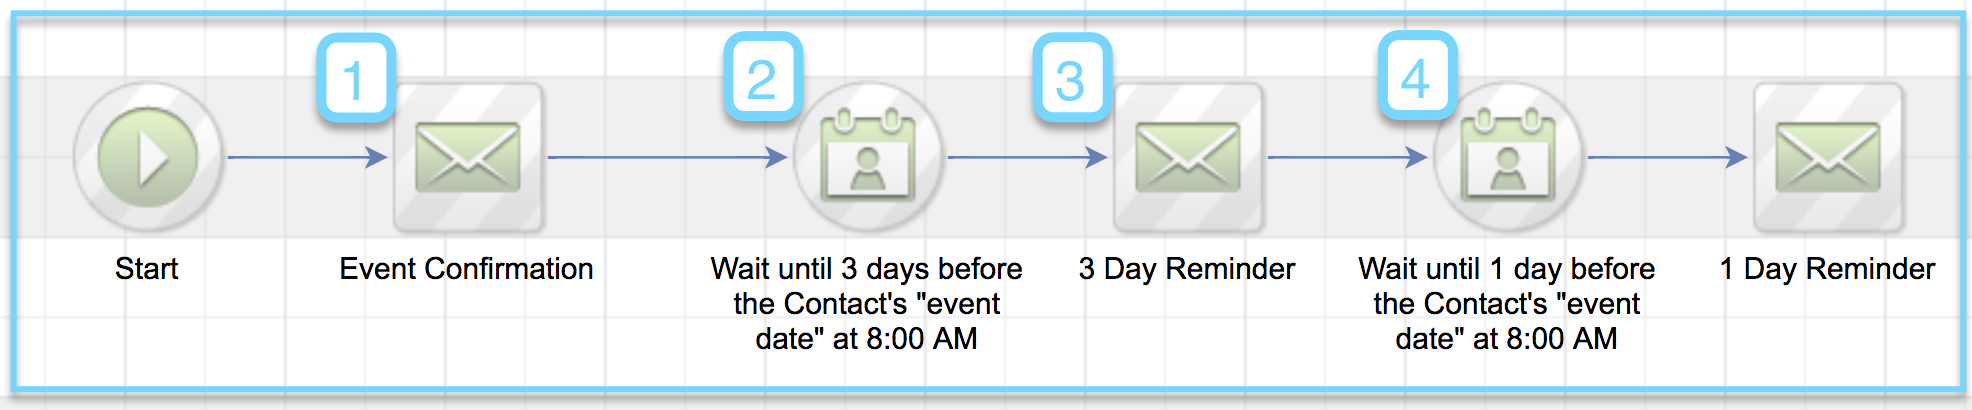
I spent days and days creating this masterpiece of a campaign. Circa 2015, it most likely took this form:  Zombie Pipeline for Infusionsoft screenshot

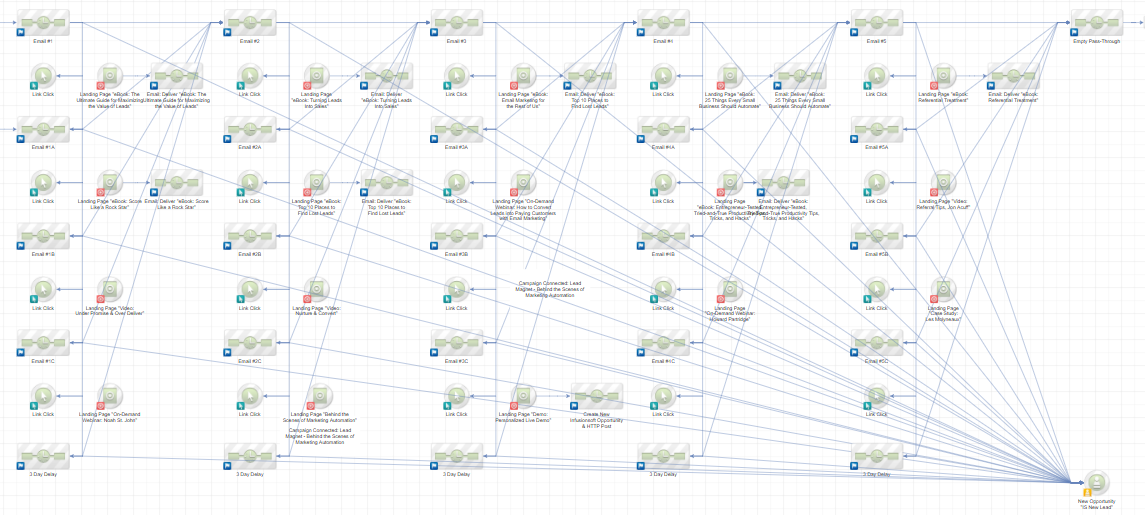
Family Drama. (Tragedy of tragedies).

Even after the explainer videos, SOPs, and daily walk-throughs, the team did not seem to “appreciate” the beauty that was this pipeline. They did not “appreciate” my genius.

The team’s stages of emotion went as follows: Excitement → Overwhelm → Frustration → Fury → Abandonment → Mutiny.

I was mad. They were mad. Horror of horrors.

Husband and Mom said to me “Yea. Infusionsoft is never going to work. Turn it all off.” It was the abject failure of what I’d hoped to achieve. A painful and bitter defeat, as you can imagine.

Has this ever happened to you? Overwhelmed with the depth of possibilities of Infusionsoft – the eject button starts to look more and more appealing, you, your staff, the client, everyone just wants out? So much so, that they give up on a masterpiece of a campaign you’re created. Whether it has or hasn’t happened, I’m hoping this post will help you prevent it entirely.

After this epic fail, a new adventure turned up for me professionally.

New Year. Who dis?

In January 2017, I left Infusionsoft to work in the family business full-time(ish).

I ramped up social and traffic on the inter-webs. Of course, this meant that there were more consultation appointments, and it was difficult for the team to manage the follow-ups manually.

I enjoy sarcasm and fighting with my family (exasperation can be fun, no?), so I decided to give the Sales Pipeline integration another shot with a different approach. So this is what I did.

Ready for Home Makeover Pipeline 2.0?

Sales Pipeline screenshot

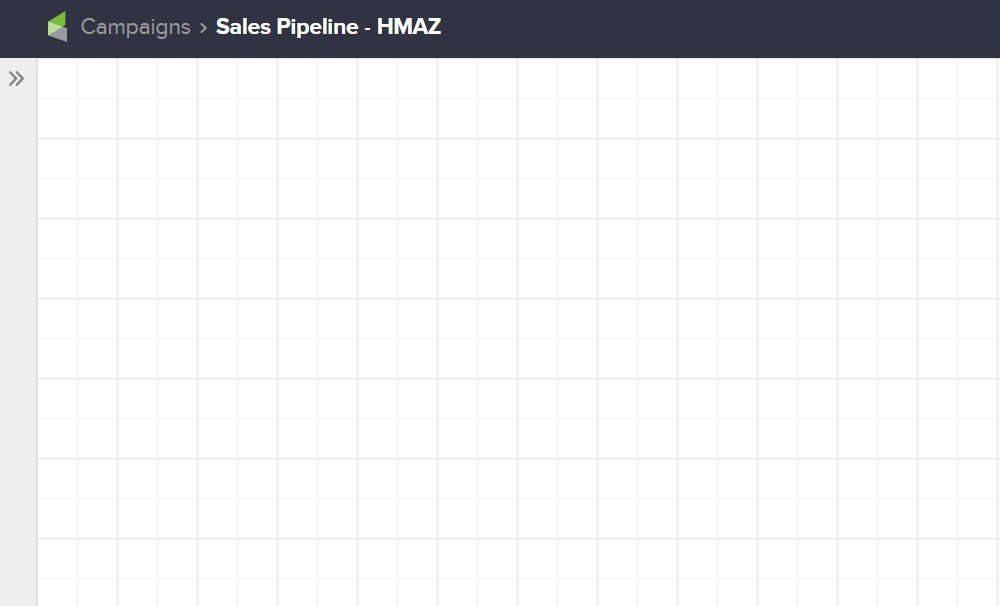
Tah-Dah!  Presto!  Voila!

With this new, improved Sales Pipeline campaign, team buy-in increased 200%. Daily usage of Infusionsoft increased 600%. Hearts were healed. The pope kissed my ring.

“But Reyna – Where is the pipeline? What converted the skeptics? I don’t get it. You’re weird.”

Husssshhh.

Pipeline

The Catalyst.

The change in team member adoption had nothing to do with a campaign.

It had everything to do with

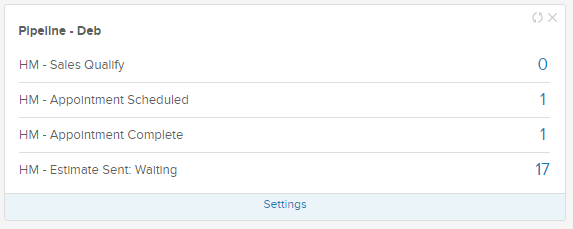
  • Access to real-time reports
  • Instant opportunity organization
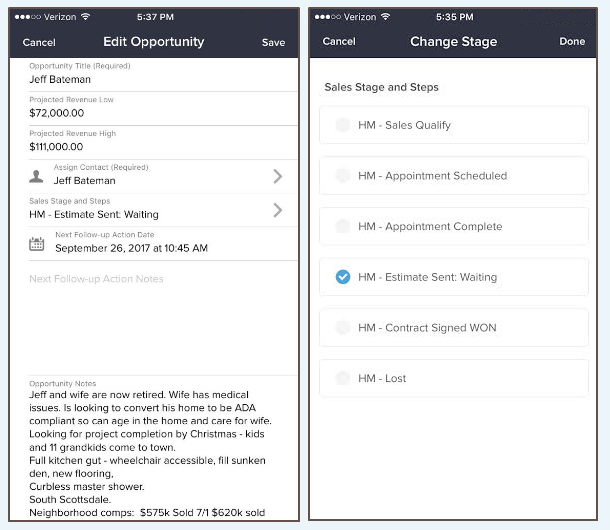
  • Easy access via Infusionsoft Mobile

Make Infusionsoft Feel Like Home.

As an Infusionsoft implementer, we tend to think we know what the world needs when it comes to a Pipeline.

We know the value that a ladder pipeline offers over a linear one. But even so, inevitably, we’ll miss.

On day one, people want to feel like they’re still in their comfort zone, even though they’re in a new system. Whether it’s your clients or your in-house sales team, they want to feel like they still have control.

“But Reyna – Sales Pipeline can do so much more. This is beneath me.”

Sure! Version 4/Death Star in a few months will look different. But I’m telling you – START HERE.

I lovingly refer to Version 1 of Sales Pipeline as “Zombie Autopilot Phase”

Zombie Autopilot Workflow Instructions:

One: Add the Opportunity name inside of Infusionsoft Mobile. No notes. No dates. No fluff.
Two: Change the opportunity stage when needed inside of Infusionsoft Mobile.
Three: Rinse and repeat.

I dare you – deploy Sales Pipeline for two weeks exclusively via Zombie Autopilot Phase to your team.

As soon as the dashboard reporting starts reflecting and helping out with their Opportunity organization, they are grateful.

Grateful that Sales Pipeline is 1. easy. 2. helpful. 3. does exactly what they expect it to do (sans surprises).

The Flip.

Now,  I’ll tell you what’s kinda surprising. Suddenly, unprompted by you, people start asking Infusionsoft to do a little more. Take notes. Send a reminder email. Forecast revenue.

See that psychological flip? The asking part? The transfer of ownership? #money

20/20

Looking back, the cause of the mutiny after I released the original Death Star campaign was not a group of people excited to start a fight with each other.

It was ME.

I was big-headed and conceited. I was too excited to show off my fancy new automation.

So if you want to build a Sales Pipeline for a reluctant client (or reluctant sales team) – follow these steps:

  1. Build 4-8 oversimplified stages. (Read More)
  2. Put the done-for-you pipeline widget on the dashboard for your users. (Read More)
  3. Create Opportunity Records or your most serious prospects. (Read More)
  4. Use Infusionsoft Mobile to keep opportunities updated.
  5. Resist the urge to create an over-complicated Death Star Campaign.

Because it’s not about the campaign.

Lessons Learned

By not focusing on a fancy feast campaign, here are some positives that came out of Zombie Autopilot Sales Pipeline deployment.

Instant Gratification. It takes less than 15 minutes to build something like this and put it in your client’s hands. Wow moment? Yep! Great time to ask for a review? Yep!

Confidence Boost. Clients understand Sales Pipeline right away. They feel smart. Especially if they’ve heard negative things about Sales Pipeline before.

No Desktop Login. Infusionsoft Mobile is so ridiculously simple for managing the day-to-day in Sales Pipeline. Ever have clients that spend time outside of the office, on-site? Ever had a client get overwhelmed the second they log in to Infusionsoft? Yep. Mobile avoids that.

Proof of Concept. One of the harder parts of Sales Pipeline is learning to operate it and the concept of moving an Opportunity around. By focusing just on Opportunity movement first, clients are sold quickly.

Transfer of Ownership. As soon as I stopped begging the team to care about using Sales Pipeline, and I showed them the results, they stepped up and asked for more features. This is what we want in a client relationship, right?

In summary, QTMB&KISS – Quit The Monkey Business and Keep It Simple, Stupid. You’ll win the appreciation of your clients, staff, or anyone else who needs a pipeline that way.

Note: Remember that in order to utilize Opportunities you’ll need to have a version of the software that includes this module. If you don’t have it currently, you can upgrade to add it.

Bio: Reyna Bovee is a former Partner Trainer at Infusionsoft, and now works full-time leading business development and marketing in a family business she helped start. In her role at Infusionsoft she created content that helps elevate Partners’ businesses by adding Infusionsoft as an additional revenue stream.

For the past four years, Reyna has been driving her family business’ growth through the use of Infusionsoft. She lives and breathes small business every day, and understands the challenges and triumphs that come with owning and running a business.